How to Repair a Broken Exhaust Hanger: A Step-by-Step Guide
Have you ever been driving down the road, minding your business, when suddenly you hear a strange noise coming from under your car? It could be a broken exhaust hanger. I had a similar experience not too long ago. I was cruising down the highway, enjoying the ride, when I noticed my car's exhaust system was making a weird rattling sound. Turns out, the exhaust hanger had snapped, causing the exhaust pipe to hang loosely. If you find yourself in a similar situation, don't panic! With a few tools and a little elbow grease, you can repair it yourself and save a trip to the mechanic.

J&J Auto Repair
2879 Lockbourne Rd, Columbus, OH 43207, USA
1. Understanding the Exhaust Hanger and Its Role
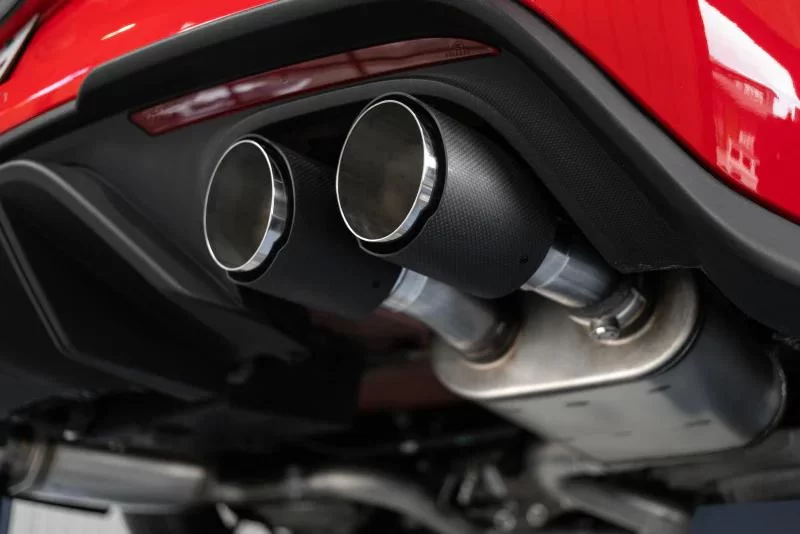
The exhaust hanger is an essential component of your vehicle's exhaust system. It’s a metal bracket designed to hold your exhaust pipe in place, preventing it from sagging or moving too much. These hangers help reduce vibrations and prevent damage to other parts of the exhaust system. When they break or wear out, the exhaust pipe may hang loosely, causing rattling noises or even damage to other parts of the exhaust system. Understanding how the hanger works will help you fix it more effectively.

Lopez Auto Repair
1290 W Mound St, Columbus, OH 43223, USA
2. Signs of a Broken Exhaust Hanger
Before you start repairing the exhaust hanger, it’s important to identify if it’s actually broken. There are a few signs to look out for:
- Rattling Noises: If you hear a constant rattling sound when driving, especially over bumps or rough roads, it could be a broken exhaust hanger.
- Exhaust Pipe Sagging: A broken hanger will cause the exhaust pipe to hang lower than usual, which can be clearly seen when you look under the car.
- Unusual Vibrations: A loose exhaust pipe can create vibrations that are felt in the cabin of the car.
If you notice any of these signs, it’s time to take action and fix the exhaust hanger.
3. Tools You’ll Need to Repair the Exhaust Hanger
Repairing an exhaust hanger is a relatively simple task, but you’ll need a few tools to get the job done. Here’s what you’ll need:
- Jack and Jack Stands: To safely lift your car and gain access to the exhaust system.
- Socket Wrench Set: For removing and tightening bolts.
- Replacement Exhaust Hanger: You can find replacement hangers at most auto parts stores or online.
- Lubricant or Penetrating Oil: To loosen any rusted bolts that may be difficult to remove.
- Gloves and Safety Glasses: For protection while working under your car.
4. Step-by-Step Guide to Repairing the Broken Exhaust Hanger
Now that you have all the necessary tools, let’s dive into the repair process. Follow these steps to get your exhaust hanger back in working order:
Step 1: Safety First
Before you begin, make sure your car is on a level surface and the engine is off. Use a jack to lift the car and place jack stands underneath it to ensure it’s stable. Never work under a car supported only by a jack!
Step 2: Locate the Broken Exhaust Hanger
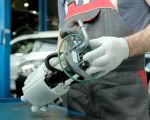
Once the car is safely lifted, get under the vehicle and locate the broken exhaust hanger. You’ll notice that the exhaust pipe is either sagging or vibrating. The hanger will be a metal bracket that holds the pipe to the chassis of the car. Check to see if the rubber has torn or the metal bracket has rusted or broken.
Step 3: Remove the Broken Hanger
To remove the broken hanger, use your socket wrench set to unscrew the bolts or nuts holding the hanger in place. You might need to spray some penetrating oil on the bolts to loosen them, especially if they’ve been exposed to the elements for a while. Once the bolts are removed, take the broken hanger off.
Step 4: Install the New Exhaust Hanger
With the old hanger removed, it’s time to install the new one. Position the new hanger where the old one was, and use the socket wrench to tighten the bolts. Make sure the exhaust pipe is secure and properly aligned. You want the pipe to be held firmly in place, but not so tight that it restricts movement. A little bit of flexibility is important for the exhaust system to function correctly.
Step 5: Lower the Car and Test Drive
Once the new hanger is installed, carefully lower the car back to the ground. Start the engine and check for any unusual sounds or vibrations. If everything sounds good, take the car for a short test drive to ensure the repair was successful. Listen for any rattling or sagging noises that might indicate the hanger is still loose.
5. Why You Shouldn’t Ignore a Broken Exhaust Hanger
Ignoring a broken exhaust hanger might seem like a minor issue, but it can lead to bigger problems down the road. A loose exhaust pipe can cause damage to other components, such as the catalytic converter or muffler. It can also lead to poor gas mileage and even affect the performance of your engine. Fixing the problem early will save you time and money in the long run.
By repairing a broken exhaust hanger yourself, you’re not only saving on repair costs, but you’re also gaining a sense of accomplishment. The process isn’t too difficult, and with the right tools and some patience, you’ll have your car’s exhaust system back in tip-top shape.
Remember, if you’re ever unsure about your ability to perform this repair, it’s always a good idea to consult a professional mechanic. But with the steps outlined here, you should be able to tackle the job with confidence.
6. Tips for Preventing Future Exhaust Hanger Issues
Once you’ve repaired your exhaust hanger, you’ll want to take steps to prevent future issues. Here are a few tips:
- Regular Inspections: Check your exhaust system regularly for signs of wear or damage. Look for any sagging pipes, rust, or broken hangers.
- Keep Your Exhaust System Clean: Dirt and debris can accelerate rusting. Make sure your exhaust system is free of dirt, salt, and grime.
- Drive Gently: Avoid aggressive driving and hitting bumps too hard, as this can put unnecessary strain on your exhaust system.