How to Change a Flat Tire on a Vehicle with Low Ground Clearance
If you’ve ever found yourself on the side of the road with a flat tire, you know how frustrating it can be. But when you’re driving a vehicle with low ground clearance, changing that flat tire can seem like an even bigger challenge. As someone who’s been in this situation more than once, I can tell you that it’s not as complicated as it seems, but it does require a bit of extra preparation and patience. Let me walk you through the process of changing a flat tire on a vehicle with low ground clearance and how to make the job easier for yourself.
pgsql复制1. Preparing for the Job
Before you get started, there are a few key things you need to do to ensure the process goes smoothly. Having the right tools and knowing what to expect can make all the difference. Here's what you should gather:
Step 1: Gather the Necessary Tools – When changing a tire, having the right tools is crucial. For a vehicle with low ground clearance, you’ll need a few extra items to help lift the car high enough to remove the flat and install the spare tire. These tools include:
- A jack (preferably a low-profile one)
- A lug wrench
- A spare tire
- A tire chock (to secure the vehicle from rolling)
- A flashlight (if you're working in low light conditions)
Step 2: Safety Precautions – Safety should always come first. Make sure you’re parked on a level, stable surface away from traffic. If you're on the road, try to find a safe area like a shoulder or parking lot. Turn on your hazard lights to make sure other drivers can see you, and put the vehicle in "Park" (or "Neutral" if it’s a manual transmission). Use a wheel chock on the opposite tire to prevent the car from rolling.

MR. TIRE INC.
2078 New York Ave, Huntington Station, NY 11746, USA
2. Lifting the Vehicle with Low Ground Clearance
One of the biggest challenges when changing a flat tire on a low-clearance vehicle is getting the car high enough to remove the tire. In my experience, using a standard jack can sometimes be a hassle because it might not fit under the car or lift it high enough. Here’s how to tackle the lifting process:
Step 1: Position the Jack – Find the designated jacking point on your vehicle, which is typically listed in your vehicle’s owner manual. For most cars, these are located just behind the front wheels or just in front of the rear wheels. Since you're working with a low-clearance car, you might need to slide the jack under the car carefully. A low-profile or scissor jack works best in this situation as they’re designed for vehicles with lower clearance.
Step 2: Use a Jacking Pad or Board – If your jack is still having difficulty sliding under the car, you can create a bit more clearance by using a piece of wood or a jacking pad. Placing a sturdy board or pad under the jacking point will give the jack enough height to work properly. This is especially useful if the ground is soft, as it helps to distribute the weight more evenly.
Step 3: Lift the Vehicle Slowly – Once the jack is securely positioned, begin lifting the car slowly. Make sure the jack is in a stable position and doesn’t slip. It’s crucial that the vehicle is lifted to a height where the flat tire can be removed and the spare can be installed. You should aim to lift the car just enough for the tire to be free of the ground.
MR. TIRE INC.
2078 New York Ave, Huntington Station, NY 11746, USA
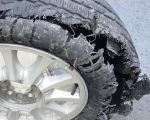
3. Removing the Flat Tire
Now that the vehicle is lifted, it’s time to remove the flat tire. While this part is fairly straightforward, there are still a few things to keep in mind when dealing with low-clearance vehicles:
Step 1: Loosen the Lug Nuts – Using the lug wrench, loosen the lug nuts on the flat tire before lifting the car fully. This is important because loosening the nuts while the car is still on the ground gives you more leverage. Use the wrench to turn the nuts counterclockwise. If they’re too tight, you can apply some extra force by standing on the wrench or using a breaker bar for more torque.
Step 2: Remove the Lug Nuts – Once the nuts are loosened, remove them completely and set them aside in a safe spot so you don’t lose them. Carefully take off the flat tire, being mindful of the weight of the tire and the space around you. Depending on the vehicle, the tire may be slightly more difficult to remove due to its close proximity to the ground, but with a little patience, it should come off without a hitch.
4. Installing the Spare Tire
With the flat tire removed, it’s time to install the spare. While this is a simple task, you need to make sure the spare tire is properly aligned and secure:
Step 1: Align the Spare Tire – Carefully align the spare tire with the wheel hub. Make sure the holes in the wheel line up with the bolts on the car. This might take a little wiggling to ensure that everything is properly aligned. Once the tire is in place, gently slide it onto the wheel hub.
Step 2: Tighten the Lug Nuts – Place the lug nuts onto the bolts and hand-tighten them as much as possible. Once all the nuts are on, use the lug wrench to tighten them further in a star pattern. This ensures the pressure is evenly distributed across the tire. Be sure to tighten each nut securely, but avoid overtightening them at this stage.
5. Lowering the Vehicle and Final Checks
After the spare tire is installed and the lug nuts are tightened, you can lower the vehicle back to the ground. This is the final step, but there are a few more things to consider:
Step 1: Lower the Vehicle – Slowly begin to lower the jack, making sure the vehicle is stable as it comes down. Once the car is completely lowered, you can remove the jack from underneath the car. At this point, the car should be securely resting on the spare tire.
Step 2: Tighten the Lug Nuts Again – Once the car is on the ground, go back and double-check that the lug nuts are tightened properly. Use the lug wrench to apply some final torque to the nuts in a star pattern to make sure they are evenly tightened and secure.
Step 3: Check the Tire Pressure – Before you drive off, it’s a good idea to check the tire pressure of the spare tire. Some spare tires, especially compact spares, require higher pressures than regular tires. Be sure to follow the manufacturer’s specifications and inflate the spare tire to the recommended pressure.
6. Conclusion: Driving Away with Confidence
After all these steps, you should be ready to drive away with your new spare tire. Changing a flat on a low-clearance vehicle requires a bit more patience and the right tools, but with careful preparation, it’s entirely manageable. Keep in mind that if you don’t feel confident in doing this yourself or are in a location that’s not safe, it’s always a good idea to call for professional help. Roadside assistance companies or local towing services can provide fast, efficient help if needed.