How to Properly Charge a Jump Starter: A Guide for Car Owners
As someone who has found themselves stranded in the middle of nowhere due to a dead car battery, I know how frustrating it can be to wait for a tow or a friend to help out. That’s when having a reliable jump starter on hand can make all the difference. But what happens when your jump starter is also out of power? Don’t worry, in this article, I’m going to walk you through everything you need to know about how to properly charge a jump starter, so you're always prepared for the next emergency situation.

Valvoline Instant Oil Change
3845 N 132nd St, Omaha, NE 68164, USA
1. Why You Need a Jump Starter in the First Place
Before diving into how to charge your jump starter, it's worth understanding why it's so essential to have one, especially in emergencies. Imagine you’re running late for a meeting or just about to head out for a long road trip. The last thing you want is for your car to not start because of a dead battery. That's when a jump starter comes in handy. It's a portable device that helps you start your car even if your battery is completely drained, without the need for a second vehicle or assistance from a tow truck. Over the years, I’ve relied on mine on several occasions and it has been a game-changer during unexpected breakdowns.
Rollin Automotive Auto Repair
2 Split Rock Rd, Syosset, NY 11791, USA
1.1 The Convenience of Jump Starters
The convenience of jump starters cannot be overstated. Unlike traditional jump-starting methods where you need another car and jumper cables, a jump starter allows you to start your vehicle anywhere, whether you’re at home, on the side of the road, or even in a parking lot. I’ve used mine in remote areas without cell service, and it saved me the time and hassle of waiting for help.
2. How Does a Jump Starter Work?
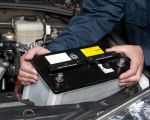
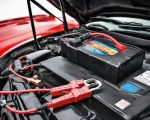
To understand how to charge a jump starter properly, it's essential to know how the device works. A jump starter is essentially a battery pack with a set of cables that connect to your car’s battery. The device provides a surge of power to start your car’s engine. There are different types of jump starters, but the most common are lead-acid battery-based or lithium-ion battery-based units. Regardless of the type, they function by temporarily transferring their stored energy to the dead battery to give your car the power it needs to start.
2.1 Lead-Acid vs. Lithium-Ion Jump Starters
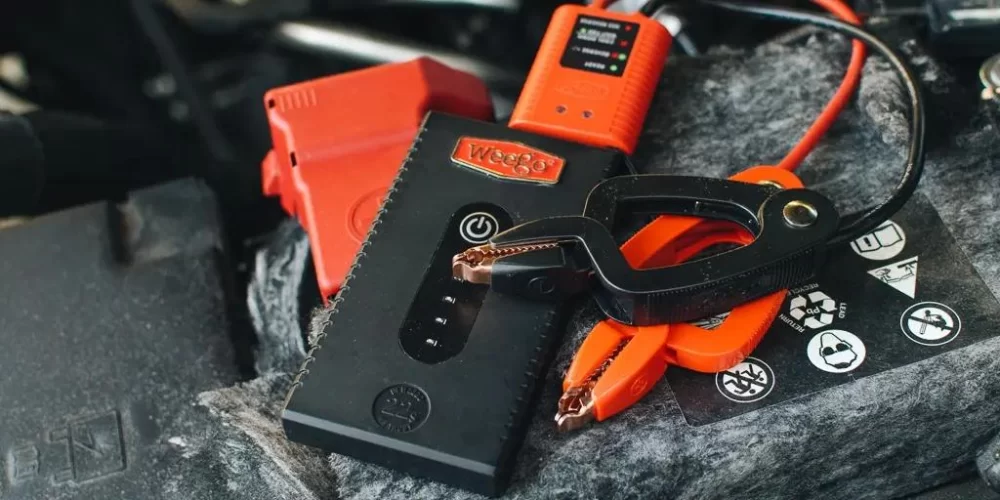
When choosing a jump starter, you’ll often come across two main types: lead-acid and lithium-ion. Both have their pros and cons. For example, I’ve used both types over the years, and while lead-acid is generally more affordable and offers more power, lithium-ion models are more lightweight, portable, and have a longer shelf life. Understanding these differences will help you decide which one is best for your needs, but no matter which you choose, both require proper care and charging to function optimally when needed.
3. How to Charge Your Jump Starter
Now that you understand why jump starters are so important and how they work, let’s dive into the essential part: charging. Charging a jump starter properly is critical to ensuring it will be ready to use when you need it most. Here’s what I’ve learned over time:
3.1 Use the Right Charger
When I first got my jump starter, I didn’t realize the importance of using the correct charger. Many jump starters come with a specific charger designed for their battery type. Always use the charger that comes with the device or one that is recommended by the manufacturer. I once made the mistake of using an off-brand charger, which led to slower charging times and decreased efficiency. Always check the instructions and ensure you’re using the correct charger for optimal performance.
3.2 Charging Time: How Long Does It Take?
Charging time for a jump starter can vary depending on the model and battery size. For example, a lithium-ion jump starter can typically be charged in 4-6 hours, while a larger lead-acid battery might take up to 12 hours. In my experience, it’s always best to charge your jump starter fully before storing it, especially if you anticipate needing it for an emergency. I've learned the hard way that leaving it partially charged can reduce its effectiveness when you need it most. It’s also a good idea to recharge it every few months, even if you haven’t used it, to keep the battery in good condition.
3.3 Signs of a Faulty Jump Starter Battery
Sometimes, a jump starter’s battery can fail or degrade over time. This has happened to me once, and I couldn’t figure out why the device wasn’t working properly, even though I had charged it. Some signs that your jump starter may need to be replaced or repaired include:
- Failure to hold a charge: If your jump starter won’t charge or loses charge quickly, it could be a sign that the battery is failing.
- Slow charging: A jump starter that takes longer than usual to charge might indicate that the battery is nearing the end of its life.
- Unreliable power output: If the jump starter no longer provides enough power to start your car, the internal battery might be damaged.
4. Maintaining Your Jump Starter for Longevity
After using my jump starter multiple times, I’ve realized that maintaining it is key to prolonging its life and ensuring it works when I need it. Proper maintenance is simple and easy to follow. Here’s how I keep my jump starter in good condition:
4.1 Keep It Charged
As I mentioned earlier, it’s important to charge your jump starter fully before storing it. Keeping the battery charged to at least 50% will prevent it from discharging completely, which can lead to permanent damage. I usually keep mine in my garage, and every 3-4 months, I make sure to top it up so it’s always ready to go.
4.2 Store It in a Safe Location
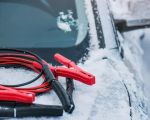
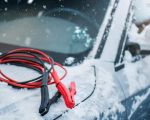
Where you store your jump starter matters too. I always keep mine in a cool, dry place. Storing it in a place that’s too hot or too cold can reduce its battery life. Avoid leaving it in direct sunlight or in a vehicle that’s exposed to extreme temperatures.
4.3 Regular Testing
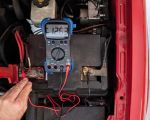
It’s also a good idea to test your jump starter periodically, even if you haven’t had a breakdown. I do this by connecting it to a battery and seeing if it holds a charge and provides enough power to start the engine. This way, I can ensure it’s in working condition before an emergency arises.
5. What to Do If Your Jump Starter Doesn’t Work
Occasionally, despite all your efforts, your jump starter might fail. If that happens, don’t panic. Here’s what you can do:
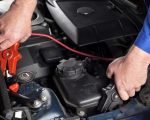
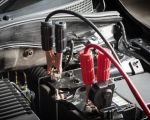
- Check the connections: Ensure that all connections are secure and that the clamps are tightly connected to the battery terminals.
- Test with another battery: If possible, test your jump starter with a different battery to rule out the possibility that the battery itself is the issue.
- Contact customer support: If all else fails, contact the manufacturer’s customer support for guidance or to request a replacement.
Even though I’ve encountered issues with my jump starter before, these troubleshooting steps helped me get back on track without too much trouble.
6. Conclusion
Learning how to properly charge and maintain your jump starter is key to ensuring it’s ready when you need it. By following these simple steps and taking proper care of the device, you’ll extend its lifespan and avoid the frustration of a dead battery when you're stuck in an emergency situation. Whether you rely on your jump starter for everyday use or as a backup in case of breakdowns, the peace of mind that comes with knowing you’re prepared is invaluable.