How to Check and Replace Your Car’s Oil Filter: A Comprehensive Guide
As a car owner, maintaining the health of your engine is one of the most important responsibilities you have. Regular oil changes are crucial to keeping your car running smoothly, but did you know that checking and replacing your oil filter is just as essential? Let me walk you through how you can easily check and replace your car’s oil filter. Whether you’re a DIY enthusiast or just looking to save money on car maintenance, this guide will help you get the job done right.

Firestone Complete Auto Care
1933 N Placentia Ave, Fullerton, CA 92831, USA
The Importance of a Clean Oil Filter
Think of the oil filter as the heart of your car’s oil circulation system. Its job is to catch dirt, debris, and contaminants from the engine oil, preventing them from circulating through your engine. Over time, the oil filter can become clogged, reducing its efficiency and causing poor engine performance. That’s why it’s so important to check and replace it regularly.

Complete Auto Service of Ann Arbor
2890 Jackson Ave, Ann Arbor, MI 48103, USA
What You Need Before You Start
Before you dive in, there are a few things you’ll need to gather. Here’s a simple checklist:
- New oil filter (make sure it’s the right one for your car model)
- Wrench or oil filter wrench
- Drain pan
- Gloves to keep your hands clean
- Car jack (if you need to lift your car)
- Oil (if you're also changing the oil)
- Funnel (optional, for refilling the oil)
Step 1: Prepare Your Car
Before you start, make sure your car is parked on a level surface, and the engine has cooled down. Working with hot engine oil can be dangerous, so give it enough time to cool off. If you're planning on changing the oil at the same time, you may want to raise your car using a jack. Otherwise, ensure the car is secure and level.
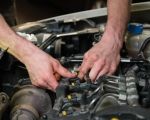
Step 2: Locate the Oil Filter
Now, let’s locate the oil filter. In most vehicles, the oil filter is easy to find – it’s usually located near the engine block. You might need to get under your car to access it, especially if it's a bit tucked away. If you’re unsure where to find it, consult your car’s manual or search for your car model online to get specific instructions. Remember to wear gloves to avoid getting dirty.
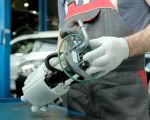
Step 3: Remove the Old Oil Filter
Use your wrench or oil filter wrench to loosen the old oil filter. You may need a bit of elbow grease, but be careful not to damage any surrounding components. Once it’s loose, finish unscrewing it by hand. As you do this, make sure you have your drain pan ready because some oil may spill out as you remove the filter.
Step 4: Check for Any Residual Oil
Once the old filter is removed, check for any residual oil that might spill from the engine. Make sure to clean the area around the filter mount before installing the new filter. You can use a clean rag or paper towels for this. This ensures that no dirt or debris gets into the engine when you install the new filter.
Step 5: Install the New Oil Filter
Now it’s time to install the new oil filter. Make sure to coat the rubber gasket of the new filter with a small amount of oil. This helps create a seal and prevents leaks. Screw the new filter into place by hand. Be careful not to overtighten, as this can damage the filter or the mounting surface. It’s important to just hand-tighten it – you’ll get a good seal without overdoing it.
Step 6: Check Oil Levels and Test Drive
After the new filter is installed, it’s time to check your oil level. If you’re also changing the oil, now is the time to pour in the new oil. Use a funnel to avoid spills. Once the oil is in, use the dipstick to check the oil level and top it off if necessary. Start your car and let it run for a minute. Check around the oil filter for any signs of leaks. If everything looks good, you're all set!
Why You Should Replace Your Oil Filter Regularly
Replacing your oil filter is not just about keeping your car running smoothly; it’s about extending the life of your engine. A clogged or dirty oil filter can cause your engine to work harder, potentially leading to expensive repairs down the road. Regular maintenance, including checking and replacing your oil filter, can prevent these problems. If you don’t replace your oil filter regularly, you risk contaminants circulating through your engine, which can cause serious damage over time.
Common Mistakes to Avoid
Even though replacing an oil filter is straightforward, there are a few mistakes you should avoid:
- Not tightening the filter enough: Ensure the filter is hand-tightened, but don’t overdo it.
- Using the wrong filter: Always double-check that the new filter is the correct one for your car.
- Forgetting to clean the filter mount: Make sure the area around the filter is clean before installing the new one.
- Not checking for leaks: After installation, always check for oil leaks to ensure the filter is seated properly.
Conclusion
Replacing your oil filter is a simple yet essential part of car maintenance. By following these steps, you can keep your engine running smoothly and avoid costly repairs. Whether you’re a car enthusiast or just looking to maintain your vehicle in top condition, knowing how to check and replace your oil filter is an invaluable skill. Plus, it gives you that satisfying feeling of taking care of your car on your own.
For any towing or emergency services, feel free to visit us at Rescue & Towing for the best recommendations and support when you need it most.