How to Fix a Car with a Bad Alternator: A Step-by-Step Guide

Published on Apr 21, 2025
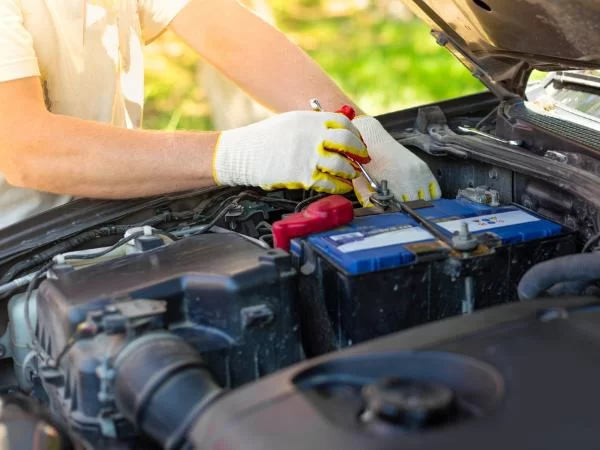
How to Fix a Car with a Bad Alternator: A Step-by-Step Guide

How to Fix a Car with a Bad Alternator

Understanding the Role of the Alternator

One of the most crucial components in your car’s electrical system is the alternator. If you’ve ever experienced your car suddenly stalling, dimming lights, or struggling to start, there’s a good chance the alternator could be the culprit. I’ve gone through this firsthand, and I can tell you that a malfunctioning alternator can be both frustrating and confusing. But with a little know-how and the right tools, fixing it can be a manageable task. The alternator is responsible for charging your car’s battery and powering the electrical systems while the engine is running. When the alternator fails, your battery can quickly lose charge, which will eventually cause the car to stop running. In my case, I discovered my alternator wasn’t working when my headlights started flickering, and my car wouldn’t start after a short drive. That was my wake-up call to learn how to fix it!

Signs of a Bad Alternator

Before jumping into fixing the alternator, it’s important to identify the symptoms of a bad alternator. I’ve learned that a faulty alternator often doesn’t give a clear-cut warning, but there are several signs that can help you diagnose the issue: 1. Dimming or Flickering Lights: If your headlights or dashboard lights dim or flicker while driving, this is often a sign that the alternator is not supplying enough power to keep the electrical system running smoothly. 2. Battery Warning Light: One of the most obvious signs is when the battery warning light on your dashboard lights up. This indicates that the alternator is no longer charging the battery correctly. 3. Engine Stalling: If your car’s engine stalls while idling, or if it’s hard to start, this could be due to a bad alternator. Without sufficient electrical power, the engine can’t run properly. 4. Strange Noises: A failing alternator can make a whining or grinding noise, often caused by worn bearings or damaged internal components. I once heard a strange noise coming from my engine that turned out to be the alternator on its last legs. 5. Dead Battery: If your battery frequently dies or requires constant recharging, the alternator might not be doing its job of keeping it charged. I remember how my car wouldn’t start one morning, and after a jump start, the battery seemed fine—but only for a short while. This was a clear indicator of alternator failure.

How to Fix a Bad Alternator: Step-by-Step Guide

Now that you’ve identified the problem, it’s time to fix it. While replacing an alternator can be a bit of a job, I’ve found it to be doable with the right tools and some patience. Here’s a step-by-step guide based on my own experience: 1. Preparation and Safety First - Before diving in, make sure the car is turned off, and the battery is disconnected. You don’t want any accidental shocks while working on the electrical system. Wear safety gloves and goggles to protect your hands and eyes from dirt and debris. - You’ll need a few tools to get started: a socket wrench set, a belt tensioner tool, a replacement alternator (make sure it's compatible with your car model), and possibly a pulley removal tool depending on your car’s make and model. 2. Locate the Alternator - The alternator is typically located on the front of the engine. It may be helpful to consult your car’s manual for specific instructions on where it is located, as the position can vary between models. - Once you’ve found it, inspect the alternator for any visible signs of damage, such as worn-out wires, corrosion, or loose parts. Sometimes, the issue can be as simple as a loose connection, which you can tighten without needing to replace the whole alternator. 3. Remove the Serpentine Belt - The serpentine belt is responsible for driving the alternator. Using a socket wrench, release the tension on the belt and remove it from the alternator pulley. Make sure to take note of how the belt is routed, as you’ll need to put it back in the same position. - In my case, the tensioner pulley was tricky, but once I loosened it, the belt came off with ease. 4. Disconnect the Electrical Connections - Next, disconnect the electrical wires attached to the alternator. There should be a main power wire and a plug for the voltage regulator. Be careful when doing this, as you don’t want to accidentally damage any of the wiring. - I found that a flathead screwdriver was useful for prying off the electrical connectors, but it’s important to be gentle to avoid damaging the connectors. 5. Remove the Old Alternator - Now that everything is disconnected, it’s time to remove the alternator. Use your socket wrench to unscrew the bolts holding the alternator in place. Depending on the car, this may involve removing other parts, such as the air intake or engine covers, to access the bolts. - Once the bolts are removed, carefully take out the alternator. It might take a little wiggling, especially if it’s tightly fitted, but with a little patience, it should come free. 6. Install the New Alternator - Place the new alternator in the same position as the old one. Secure it with the bolts you removed earlier. Make sure it’s tightly fastened, as a loose alternator can cause problems down the road. - Reconnect the electrical wires to the new alternator. Double-check the connections to ensure they’re secure and properly attached. 7. Reinstall the Serpentine Belt - Now, it’s time to reinstall the serpentine belt. Use the belt tensioner tool to apply tension to the belt and make sure it’s properly routed around the pulleys. If you’re unsure about the routing, refer to your car’s manual for guidance. - I’ve found it helpful to have a friend hold the tensioner in place while I work to position the belt. 8. Reconnect the Battery and Test the Alternator - Reconnect the car battery and start the engine. Check the dashboard for any warning lights, and listen for any unusual noises. The alternator should start charging the battery, and the battery light should turn off. - If everything sounds and looks good, take the car for a test drive to ensure everything is functioning properly.

When to Seek Professional Help

While fixing a bad alternator can be a DIY project, it’s not always the easiest repair. If you find that the process is more complicated than expected, or if you don’t feel comfortable working with your car’s electrical system, it may be best to consult a professional mechanic. In some cases, such as when the alternator is difficult to access or involves complicated parts, a professional repair may save you time and stress. In my case, I felt confident in tackling the job myself, but after speaking with a few experienced mechanics, I realized there are always additional tricks and tips that can make the job easier. If you’re ever in doubt, don't hesitate to reach out to a professional for help.

Conclusion

Fixing a bad alternator isn’t the easiest car repair, but with the right tools and a bit of patience, it’s entirely possible to do it yourself. From identifying the symptoms to replacing the alternator, I’ve learned that the key is to take your time and follow the steps carefully. With the proper knowledge and a few helpful tips, you can get your car back on the road in no time—saving money and gaining a sense of accomplishment in the process.

Auto Repair Shops Near Me

Recommended

How to Find the Best Car Repair Specialists Near Me: A Complete Guide

How to Find the Best Car Repair Specialists Near Me: A Complete Guide

Discover how to find the best car repair specialists near you with this step-by-step guide. Learn the key factors to consider, and get practical tips for choosing reliable and trustworthy auto repair services.

Apr 24, 2025
Reliable 24/7 Towing Service: Always Ready to Help in an Emergency

Reliable 24/7 Towing Service: Always Ready to Help in an Emergency

Stranded on the road? Our 24/7 towing service is always ready to assist you with quick, reliable, and safe towing. Get back on the road in no time with our professional roadside assistance services in the USA.

Apr 24, 2025

How to Fix a Leaking Car Exhaust System: A Comprehensive Guide

How to Fix a Leaking Car Exhaust System: A Comprehensive Guide

Learn how to fix a leaking car exhaust system with this step-by-step guide. Discover easy DIY solutions for exhaust leaks, common symptoms, and essential repair tips to keep your vehicle running smoothly.

Apr 24, 2025
How to Handle a Car with Fuel System Issues: Troubleshooting and Repair Tips

How to Handle a Car with Fuel System Issues: Troubleshooting and Repair Tips

Dealing with car fuel system issues? Learn how to handle fuel system problems with this detailed guide. Step-by-step troubleshooting tips and maintenance advice.

Apr 24, 2025
How to Fix Car Power Steering Problems: A Step-by-Step Guide

How to Fix Car Power Steering Problems: A Step-by-Step Guide

Struggling with power steering problems in your car? Learn how to diagnose and fix common issues with your car’s power steering system. From fluid leaks to worn-out pumps, this guide covers it all.

Apr 24, 2025
How to Repair a Cracked Windshield: A Step-by-Step Guide for DIY Fixes

How to Repair a Cracked Windshield: A Step-by-Step Guide for DIY Fixes

Learn how to repair a cracked windshield with this step-by-step guide. Get tips and techniques for fixing small chips and cracks to restore your car's windshield to its original condition.

Apr 24, 2025