
How to Fix a Car with a Damaged Timing Belt: Step-by-Step Guide
Published on Apr 19, 2025Auto Repair Shops Near Me


Recommended

How to Troubleshoot Car Transmission Fluid Leaks
Learn how to troubleshoot and fix car transmission fluid leaks with this in-depth guide. Discover the signs of a leak, how to diagnose it, and tips on repairing the problem for a smooth-running vehicle.
Apr 27, 2025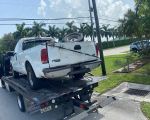
Emergency Car Towing Service: Fast and Reliable Help When You Need It Most
Need emergency car towing services? Our guide explains everything about emergency towing, from when to call for help to choosing the best service. Stay prepared for any roadside emergency.
Apr 27, 2025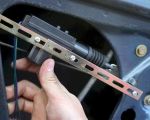
How to Repair a Broken Car Trunk Latch: Step-by-Step Guide
Learn how to repair a broken car trunk latch with this detailed, step-by-step guide. From diagnosing the issue to repairing or replacing the latch, discover practical solutions for your trunk problems.
Apr 27, 2025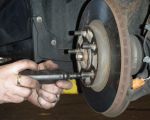
Auto Repair Services for Wheel Bearing Replacement: A Complete Guide
Learn everything you need to know about auto repair services for wheel bearing replacement. From signs of faulty wheel bearings to the replacement process and costs, this comprehensive guide will help you maintain your vehicle's safety and performance.
Apr 27, 2025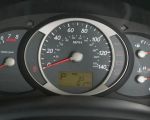
What to Do if Your Car’s Fuel Gauge is Stuck: Troubleshooting Tips for Auto Repair
Is your car’s fuel gauge stuck? Learn how to troubleshoot and fix a stuck fuel gauge with our step-by-step guide. Understand common causes and solutions to repair the issue.
Apr 27, 2025
How to Troubleshoot Electrical Issues in Cars: A Step-by-Step Guide
Learn how to troubleshoot and fix electrical issues in your car with this detailed, step-by-step guide. From diagnosing battery issues to identifying wiring problems, this guide will help you solve common electrical issues at home.
Apr 27, 2025Related Categories
Popular

The Best All-Season Tires for Your Car in 2025: Top Picks for Every Driver
Mar 07, 2025
Emergency Vehicle Towing Guide for Miami: What You Need to Know
Jan 24, 2025
How Towing Services Can Help with Engine Overheating: Immediate Assistance When Your Engine Runs Hot
Jan 24, 2025
How to Safely Use Towing Services for Vehicles with Dead Batteries
Jan 24, 2025
Why You Should Always Carry Roadside Assistance Coverage: The Key Benefits and Importance
Jan 24, 2025
Comprehensive Guide to Roadside Emergency Services: Towing, Car Rescue, and More
Feb 24, 2025
Reliable Towing for Electric Vehicles in Madison: Your Trusted Roadside Assistance
Jan 24, 2025
Flatbed Towing vs. Traditional Towing in Chicago: Which is Right for Your Vehicle?
Jan 22, 2025
What to Do After an Accident in San Francisco: A Step-by-Step Guide
Jan 22, 2025