How to Fix a Leaking Exhaust Manifold
There’s something about car repairs that seem daunting, especially when you’re faced with a problem like a leaking exhaust manifold. I still remember the day when I noticed my engine sounding louder than usual, accompanied by a distinct smell of exhaust fumes seeping into the cabin. After a bit of inspection, I discovered that the culprit was a leaking exhaust manifold. At that moment, I knew I had two options: either take it to a mechanic and pay the hefty price for the repair or fix it myself. So, I decided to take on the task. In this article, I’ll walk you through my experience of fixing a leaking exhaust manifold, sharing the steps and tips that worked for me.
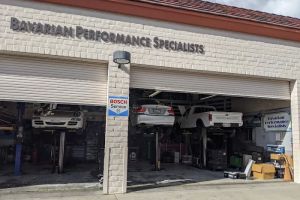
Bavarian Performance Specialists
3121 Thousand Oaks Blvd #1, Thousand Oaks, CA 91362, USA
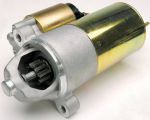
1. Understanding the Exhaust Manifold and Its Importance
The exhaust manifold plays a crucial role in your vehicle’s engine system. It is responsible for collecting exhaust gases from multiple cylinders and funneling them into a single pipe. If your exhaust manifold is leaking, it can cause a variety of issues like engine misfires, reduced fuel efficiency, and in some cases, more serious engine damage. In my case, the first sign of a leaking manifold was a noticeable decrease in engine performance. Understanding its function helped me realize why addressing the problem quickly was vital.

Peña Auto Service
1045 W Holt Ave, Pomona, CA 91768, USA
2. Identifying the Symptoms of a Leaking Exhaust Manifold
Before I jumped into fixing the problem, I needed to confirm that it was indeed the exhaust manifold causing the issue. The signs of a leaking exhaust manifold are fairly straightforward, and I noticed several of them in my vehicle:
2.1 Loud or Abnormal Engine Noise
When I first started my car, I heard a ticking noise coming from the engine, particularly when it was cold. This was a classic symptom of an exhaust manifold leak. The ticking sound occurs because the hot exhaust gases escape before they can enter the exhaust pipe properly.
2.2 Reduced Engine Power
Another sign was the decrease in engine power. I found that my car was sluggish when accelerating, and the engine struggled to maintain high speeds. This can happen because the leak disrupts the flow of exhaust gases, causing the engine to operate less efficiently.
2.3 Check Engine Light
In some cases, a leaking manifold can trigger the check engine light. This is usually due to the oxygen sensor detecting an abnormal mixture of air and exhaust gases. I was lucky enough to notice the symptoms before the light came on, but it’s something to watch for.
3. Tools and Materials You Will Need
Fixing a leaking exhaust manifold is not a job to be taken lightly. It requires some mechanical know-how and the right tools. Here’s what I gathered before starting the repair:
3.1 Wrenches and Socket Set
You’ll need a good set of wrenches and sockets to remove the bolts on the exhaust manifold. I found that a combination of metric and standard sockets worked best for my car, depending on the specific size of the bolts.
3.2 Gasket Remover
If the gasket between the manifold and the engine block is damaged, you’ll need a gasket remover. This tool is designed to make the process of removing old gaskets easier without damaging the surfaces.
3.3 Replacement Gasket
I also purchased a replacement gasket. The gasket is crucial for sealing the exhaust manifold to the engine block, and a new one is necessary if the old one is compromised. Make sure to get the correct gasket for your vehicle’s make and model.
3.4 Torque Wrench
A torque wrench is essential to tighten the bolts to the proper specifications. This ensures that the manifold is secured correctly and helps avoid further damage to the threads or gasket.
3.5 Safety Gear
Before starting, I made sure to have the proper safety gear—gloves, eye protection, and a work light. Working around hot engine components can be hazardous, and it’s important to stay safe during the repair.
4. Step-by-Step Guide to Fixing a Leaking Exhaust Manifold
Now, let’s dive into the steps I took to fix my car’s leaking exhaust manifold. I’ll walk you through each step to ensure you have a comprehensive understanding of the process:
4.1 Preparing the Vehicle
First things first, I made sure to park the car in a well-ventilated area, preferably on a flat surface. I also allowed the engine to cool down completely. Working on hot engine parts is dangerous, and I didn’t want to risk burning myself. Once the car was safe to work on, I disconnected the battery to avoid any electrical mishaps.
4.2 Removing the Old Exhaust Manifold
Next, I located the exhaust manifold. I removed any components blocking access to the manifold, such as heat shields or other parts. Then, using my wrenches, I started loosening and removing the bolts holding the manifold in place. Some bolts were tight, and I had to use a penetrating oil to help loosen them. It was a bit time-consuming, but once the manifold was free, I was able to remove it carefully.
4.3 Cleaning the Gasket Area
With the old manifold off, I used a gasket remover to clean any leftover gasket material from the engine block. This step is essential because any debris or remnants of the old gasket can cause leaks and prevent the new gasket from forming a proper seal.
4.4 Installing the New Gasket and Manifold
I then placed the new gasket onto the engine block. After ensuring it was aligned properly, I positioned the new exhaust manifold over it. I carefully aligned the manifold with the bolt holes and started hand-tightening the bolts. Once everything was aligned correctly, I used my torque wrench to tighten the bolts to the manufacturer’s specifications. This step is crucial to avoid over-tightening or damaging the manifold.
4.5 Reassembling and Testing the Car
After the manifold was securely installed, I reassembled any parts I had removed to access the manifold. I connected the battery, started the car, and carefully checked for any signs of exhaust leaks. I listened for unusual noises and used a flashlight to check around the manifold for any visible signs of leaks. Thankfully, everything seemed to be in perfect working order!
5. Additional Tips and Precautions
During my experience, I learned a few valuable tips and precautions that can help others when working on an exhaust manifold:
5.1 Use High-Quality Parts
I made sure to buy high-quality replacement parts, including the gasket and manifold. Using subpar components can lead to more issues down the road. I recommend going for parts from trusted brands or OEM (Original Equipment Manufacturer) parts to ensure durability and reliability.
5.2 Check for Other Issues
While fixing a leaking exhaust manifold, I also checked for other potential issues in the exhaust system. Leaks or cracks in the exhaust pipe, oxygen sensors, or catalytic converters could also affect performance, so it’s a good idea to inspect those parts while working on the manifold.
5.3 Seek Professional Help When Needed
If at any point during the repair process, you feel uncomfortable or unsure, don’t hesitate to contact a professional mechanic. While I enjoyed tackling the project myself, exhaust repairs can be tricky, and it’s always good to know when it’s time to call for help.
For those of you looking for a professional mechanic to assist you, you can always check out trusted service providers like Rescue & Towing for reliable car repair and towing services.