How to Effectively Repair a Flat Tire on the Road
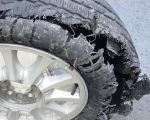
Getting a flat tire while you're out on the road can be one of the most frustrating experiences for any driver. I know this firsthand from a time I was driving through a rural area, and I heard the unmistakable sound of air escaping from my tire. It was a sudden and inconvenient situation, but luckily, I had the knowledge and tools to handle it. However, not everyone is equipped to deal with a flat tire on their own, and many find themselves in a stressful situation. In this article, I’ll walk you through the process for repairing a flat tire, including essential tips, tools, and when to call for professional roadside assistance.

MR. TIRE INC.
2078 New York Ave, Huntington Station, NY 11746, USA
1. Assess the Situation and Ensure Safety
When I first realized I had a flat tire, the first thing I did was pull over safely. Safety is always the top priority when you experience a flat tire, especially if you’re on a busy road or highway. Here’s what I did and what you should do:
- Find a Safe Spot: I drove my car a few feet off the road, as far as possible, to avoid any traffic. If you're on a highway, always pull off into a parking lot or a safe area away from moving vehicles.
- Activate Hazard Lights: To alert other drivers of your situation, I immediately turned on my hazard lights. This helps prevent accidents, especially if you’re on the side of a busy road.
- Engage the Parking Brake: Before I started working on the tire, I made sure to engage the parking brake. This keeps your vehicle stable and prevents it from rolling, especially when it's on a sloped surface.
2. Gather the Necessary Tools
Before starting the tire repair, it’s important to have all the necessary tools on hand. In my case, I had a car emergency kit that was fully equipped. Here’s what you’ll need for the tire repair process:
- Jack: To lift the car off the ground, a jack is essential. I used a hydraulic jack, but a scissor jack can also work if you're in a pinch.
- Lug Wrench: This tool is used to remove and tighten the lug nuts that hold the tire in place. A lug wrench is a must-have for the job.
- Spare Tire: You’ll need a fully inflated spare tire to replace the flat. Ensure it’s in good condition and properly inflated before you begin.
- Tire Repair Kit (Optional): If you have a tire repair kit, it can be helpful for patching up small punctures temporarily until you get a professional repair.
3. Loosen the Lug Nuts
The next step in the process is to loosen the lug nuts before lifting the car with the jack. I made sure to do this step while the tire was still in contact with the ground, as this helps prevent the tire from spinning while you work. Here’s how to do it:
- Use the Lug Wrench: Place the lug wrench on the first lug nut and turn it counterclockwise. I used my body weight to push down on the wrench, as these nuts can be quite tight. It’s important not to fully remove the lug nuts at this stage—just loosen them enough so that they can be removed later.
- Follow a Star Pattern: When loosening the lug nuts, always use a star or crisscross pattern. This ensures the even distribution of force and prevents warping the brake rotor.
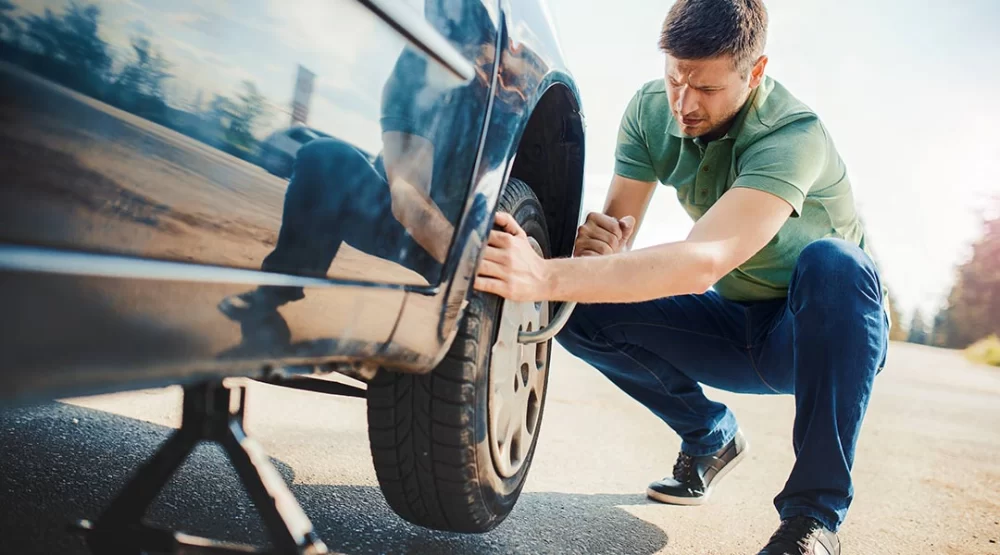
4. Lift the Car Using the Jack
Once the lug nuts are loosened, it’s time to lift the car. I positioned my jack under the car’s lifting point—usually located near the tire that needs replacing. Here’s what you need to do:
- Place the Jack: I made sure the jack was placed firmly on a stable surface, like a flat piece of asphalt or concrete. If the ground is soft or uneven, it’s important to avoid lifting the car from there as it could cause the jack to slip.
- Lift the Car: Slowly turn the jack handle to raise the car. I lifted it high enough so that the flat tire was several inches off the ground. Be sure the car is stable before moving forward.
5. Remove the Flat Tire and Replace It with the Spare
At this point, the car is safely lifted, and I’m ready to remove the flat tire. Here’s how to proceed:
- Fully Remove the Lug Nuts: Now that the car is lifted, I fully removed the loosened lug nuts using the wrench. Be sure to keep these in a safe spot so they don’t roll away.
- Remove the Flat Tire: Gently pull the flat tire off the wheel bolts. I had to wiggle it a bit since it was tightly fitted, but it came off without too much effort.
- Place the Spare Tire: Next, I lifted the spare tire onto the wheel bolts and aligned the holes. It’s important to ensure the tire is securely positioned before continuing.
6. Tighten the Lug Nuts
With the spare tire in place, it’s time to secure it. This step is crucial to ensure the tire is properly attached and safe for driving. Here’s how to do it:
- Hand Tighten the Lug Nuts: First, I hand-tightened each lug nut onto the wheel bolts. I did this in a crisscross pattern to ensure even distribution.
- Lower the Car: After tightening the nuts by hand, I lowered the car back to the ground using the jack. Once the car was securely on the ground, I used the wrench to tighten the nuts as much as possible.
- Double-Check Tightness: Before moving on, I double-checked the tightness of each lug nut. It’s essential that they are secure to avoid the tire becoming loose while driving.
7. Final Steps and Clean Up
Once the tire is securely replaced, there are just a few final steps to complete:
- Store Tools and the Flat Tire: I made sure to store all the tools in my trunk, including the flat tire. If the tire is repairable, I plan to get it fixed later. Always make sure your tools are safely stored to avoid any clutter in your vehicle.
- Check Tire Pressure: Before driving off, I made sure that the spare tire had the correct air pressure. A quick check with a tire pressure gauge is always a good idea.
8. When to Call for Professional Help
While it’s useful to know how to replace a flat tire, sometimes the situation calls for professional help. If you’re unsure about the condition of your spare tire, or if you’re in an unsafe location, don’t hesitate to call roadside assistance for help. I’ve found that in some cases, it’s best to leave the job to the experts to avoid making any mistakes or causing additional damage to the car.