How to Repair a Broken Car Trunk Latch: Step-by-Step Guide
Have you ever found yourself stuck with a broken car trunk latch? It can be a frustrating experience, especially when you have groceries, equipment, or personal belongings that you need to access. Fortunately, fixing a broken car trunk latch is something you can tackle on your own with just a few tools and a bit of patience. In this guide, I’ll walk you through the process of repairing a broken car trunk latch, share some troubleshooting tips, and tell you what to do if the repair doesn’t go as planned.

J&J Auto Repair
2879 Lockbourne Rd, Columbus, OH 43207, USA
Understanding the Common Causes of a Broken Car Trunk Latch
The trunk latch on your car plays a critical role in keeping your trunk securely closed. When it stops working properly, it can be due to various issues. Here are some of the most common causes I’ve encountered over the years:
- Worn-out latch mechanism: Over time, the latch mechanism can wear out from repeated use, especially in older cars.
- Rust and corrosion: Exposure to the elements can cause rust to build up on the latch, leading to a malfunction.
- Broken cables or linkages: The cables or linkages that connect the latch to the car’s release mechanism may snap or become detached.
- Damaged locking mechanism: A malfunction in the trunk lock itself can prevent the latch from properly securing the trunk.
Tools You’ll Need to Repair the Latch
Before you begin the repair, make sure you have the following tools at hand:
- Flathead screwdriver
- Socket wrench set
- Lubricant (such as WD-40)
- Replacement latch mechanism (if needed)
- Small pry tool (optional, for accessing hard-to-reach areas)
Step-by-Step Guide: Repairing Your Car's Trunk Latch
Step 1: Diagnosing the Problem
The first step in repairing a broken trunk latch is determining what’s causing the issue. If the latch is stuck, try spraying some lubricant into the mechanism and gently wiggling the latch. If the trunk latch is visibly broken or the mechanism won’t engage, you may need to replace it entirely.

Lopez Auto Repair
1290 W Mound St, Columbus, OH 43223, USA
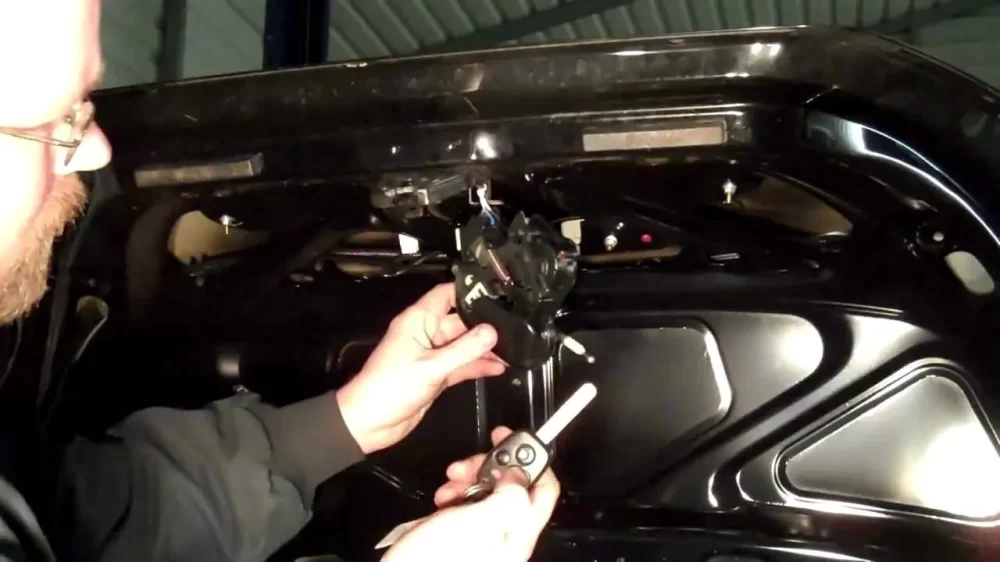
Step 2: Removing the Trunk Latch
Next, you’ll need to remove the broken latch. Start by opening your trunk and inspecting the latch area. Use a flathead screwdriver to carefully pry off any trim panels that are covering the latch mechanism. Once you have access to the latch, use a socket wrench to remove any screws or bolts holding the latch in place.
Step 3: Inspecting the Latch for Damage
Once you’ve removed the latch, carefully inspect it for signs of wear, rust, or breakage. If the latch is corroded, you might be able to clean it with a wire brush and lubricate it to restore functionality. However, if the latch is cracked or broken, it’s best to replace it with a new one. Replacement latches can be purchased from your car manufacturer or an auto parts store.
Step 4: Installing the New Latch
If you’re replacing the latch, align the new latch with the mounting holes and secure it with the screws or bolts you removed earlier. Tighten the bolts with your socket wrench to ensure the latch is firmly in place. If the latch seems loose, you may need to adjust the alignment before fully tightening the bolts.
Step 5: Reattaching the Trim Panel
Once the latch is securely installed, reattach any trim panels you removed to access the latch. Make sure all panels are aligned properly and press them back into place until they snap securely. You can use a small pry tool to help ease them back into position if needed.
Step 6: Testing the New Latch
Before you finish, test the new latch by closing and opening the trunk a few times. Make sure the latch catches properly and that the trunk closes securely. If the latch still isn’t working as expected, double-check the installation and ensure all components are in place.
Common Pitfalls to Avoid During the Repair
When repairing a broken trunk latch, there are a few common mistakes that can cause issues. Here are some tips to help you avoid them:
- Don’t rush the process: Take your time during each step to ensure the latch is correctly installed and fully functional.
- Use the right tools: Using the wrong tools can damage the latch or surrounding parts. Always use the appropriate tools for the job.
- Lubricate before installation: Make sure to lubricate the latch mechanism before reassembling the trunk, as this can prevent future malfunctions.
What to Do if the Latch Repair Doesn’t Work
If you find that the repair didn’t fix the issue, there are a few troubleshooting steps you can take. First, check the alignment of the latch and make sure everything is connected properly. If the latch still doesn’t work, you might need to consult a professional mechanic for further assistance.
As I’ve learned through my own experiences, sometimes a broken trunk latch is just the beginning of a series of car maintenance tasks. Keeping your car in good condition requires regular checks and repairs to avoid bigger problems down the road. If you find yourself overwhelmed, don’t hesitate to reach out to a professional service like Rescue & Towing for assistance with any car-related repairs.