How to Repair a Car with a Cracked Windshield
Published on Mar 08, 2025Auto Repair Shops Near Me


Recommended

Emergency Car Repair for Slipping Gears: How to Fix Gear Problems Fast
Dealing with slipping gears? Learn how to fix common gear-related issues in your car quickly and effectively. Emergency car repair tips for slipping gears.
Mar 12, 2025
Best Car Brands with the Most Reliable Engines – Durable and Long-Lasting Car Engines
Discover the best car brands with the most reliable engines that offer durability, longevity, and performance. Learn about the top car brands known for their engine reliability and why these engines stand out in the automotive world.
Mar 07, 2025
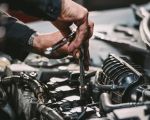
How to Clean Your Car’s Engine: A Comprehensive Step-by-Step Guide
Learn how to clean your car's engine with this in-depth, step-by-step guide. Discover useful tips and techniques for cleaning your engine bay safely, maintaining your car, and ensuring optimal performance.
Mar 07, 2025
How to Maintain Your Car’s Air Conditioning System: Tips for Smooth and Efficient Performance
Learn how to maintain your car's air conditioning system for optimal performance. Discover practical tips and expert advice on keeping your AC running smoothly, from simple checks to troubleshooting common problems.
Mar 07, 2025
Common Mechanical Issues with Car Transmissions and How to Fix Them
Discover the most common mechanical issues with car transmissions and learn how to fix them. This guide offers expert insights on identifying and resolving problems with your car's transmission, helping you maintain optimal performance and avoid costly repairs.
Mar 04, 2025
How to Fix a Leaking Exhaust Manifold: A Step-by-Step Guide
Is your car's exhaust manifold leaking? Learn how to fix a leaking exhaust manifold with this detailed step-by-step guide. Find out how to troubleshoot, repair, or replace the exhaust manifold, and get expert tips for a successful DIY repair.
Mar 04, 2025Related Categories
Popular

How to Temporarily Fix a Damaged Fuel Line and What to Do in an Emergency Situation
Feb 25, 2025
How to Perform a Quick Fix on a Malfunctioning Radiator Fan: A Step-by-Step Guide for Car Owners
Feb 25, 2025
How to Perform a Quick Fix for a Stuck Throttle: A Step-by-Step Guide
Mar 12, 2025
What to Do If Your Car Turn Signal is Broken: A Step-by-Step Guide
Feb 27, 2025
How to Fix a Broken Windshield Wiper Motor: A Step-by-Step Guide
Mar 12, 2025
How to Fix a Flat Tire Without Changing It
Mar 12, 2025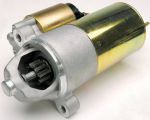
How to Troubleshoot a Bad Starter Motor: A Comprehensive Guide for Car Owners
Feb 25, 2025
When Do Car Brakes Fail? Understanding Brake Power Loss and How to Address It
Mar 03, 2025
How to Fix a Leaking Exhaust Manifold: A Step-by-Step Guide
Mar 04, 2025