1. Understanding the Importance of a Functional Fuel Gauge
When I first experienced issues with my car's fuel gauge, I thought it was just a minor inconvenience. But as I began to pay more attention, I realized how much I relied on it for keeping track of my gas levels. A faulty fuel gauge can make everyday driving much more stressful, as it leads to uncertainty about when you need to refuel. I've had a few close calls where I thought I had enough fuel, only to run out on the highway because the gauge wasn't reading accurately. If you've ever had to deal with a malfunctioning fuel gauge, you know how frustrating it can be.
The fuel gauge is a crucial part of your vehicle's dashboard system. It provides real-time information about how much fuel is in the tank, helping drivers avoid running out of gas unexpectedly. So, when it malfunctions, it not only affects your convenience but can also leave you stranded. In this guide, I’ll walk you through the common causes of a faulty fuel gauge, how to troubleshoot the issue, and a step-by-step guide on how to repair or replace it.

J&J Auto Repair
2879 Lockbourne Rd, Columbus, OH 43207, USA
2. Common Causes of a Faulty Fuel Gauge
A faulty fuel gauge can be caused by various factors, many of which are fairly easy to diagnose and repair. In my case, it was a gradual issue, with the gauge occasionally reading full even after driving for a few hours. Understanding the root cause is essential to fixing the problem effectively. Here are the most common reasons for a faulty fuel gauge:

Lopez Auto Repair
1290 W Mound St, Columbus, OH 43223, USA
2.1 Broken Fuel Sender Unit
The fuel sender unit is a crucial component of your car's fuel gauge system. It is responsible for detecting the amount of fuel in the tank and sending that information to the gauge. Over time, the sender unit can wear out, become damaged, or malfunction. In my case, after some research, I learned that a broken fuel sender unit was the likely culprit for my inaccurate fuel readings. This component can fail due to wear and tear, electrical issues, or a clog in the system. If your fuel gauge is not responding correctly, the sender unit may need to be replaced.
2.2 Faulty Wiring or Connections
Another common issue I encountered was faulty wiring or connections within the fuel gauge system. Wires that are corroded, loose, or broken can lead to intermittent or completely inaccurate readings on the fuel gauge. During my troubleshooting process, I found that the wiring connected to the sender unit had some corrosion that caused signal issues. Cleaning the connectors and ensuring a tight, secure connection can often resolve the problem.
2.3 Broken Fuel Gauge Indicator
Sometimes, the issue isn’t with the sender unit or wiring but with the fuel gauge itself. Over time, the fuel gauge may become damaged or worn out, leading to incorrect readings. In my case, when I noticed that the fuel gauge remained stuck on full even after driving, I suspected the gauge indicator was faulty. This can happen due to internal issues with the gauge's electronic components, requiring a replacement or repair of the entire gauge unit.
2.4 Issues with the Grounding System
Another less obvious cause of a malfunctioning fuel gauge could be an issue with the vehicle’s grounding system. Poor grounding can interfere with the signal from the sender unit, causing erratic or incorrect readings on the fuel gauge. I encountered this issue in an older vehicle I worked on, where the ground wire was corroded, leading to inconsistent fuel level readings. Cleaning or replacing the ground wire can solve this problem and restore accurate readings.
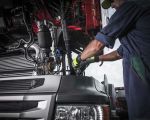
3. Tools and Materials Needed for Fuel Gauge Repair
When I set out to repair my faulty fuel gauge, I quickly realized that having the right tools was essential for the job. Depending on the specific issue you’re facing, the tools required may vary. Here’s a list of the essential tools and materials I used during my fuel gauge repair:
3.1 Basic Hand Tools
You’ll need a set of basic hand tools, including screwdrivers, wrenches, and pliers. These tools are necessary to remove any panels or parts that are obstructing access to the fuel gauge components. For example, I had to remove the dashboard panel to access the fuel gauge wiring, which required a set of small wrenches and screwdrivers.
3.2 Multimeter
A multimeter is essential for testing electrical components. I used a multimeter to check the voltage and continuity of the wiring and sender unit. This helped me identify if there were any broken connections or issues with the electrical signals being sent to the gauge.
3.3 Replacement Fuel Sender Unit (If Necessary)
If the issue is with the fuel sender unit, you’ll need a replacement part. Fuel sender units vary depending on the make and model of your vehicle, so be sure to purchase one that’s compatible with your car. I found that ordering a high-quality OEM replacement part helped ensure the best fit and functionality.
3.4 Electrical Cleaner
Electrical cleaner is a handy tool to have when working with car electronics. If you find any corrosion or dirt on the wiring or connectors, electrical cleaner can help remove the buildup without damaging the components. I used it to clean the connectors before reattaching them, which helped restore the connection and improve the gauge's performance.
4. Step-by-Step Guide to Repairing a Faulty Fuel Gauge
Once you have your tools and materials ready, it's time to begin the repair process. I’ve broken down the steps below based on my own experience fixing a faulty fuel gauge. Follow these instructions carefully to replace or repair your fuel gauge system:
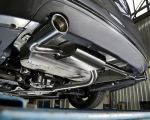
4.1 Lift the Car and Access the Fuel Tank
The first step in the repair process is to lift the car safely using a jack and jack stands. You’ll need to access the underside of the vehicle to work on the fuel sender unit. Once the car is elevated and secure, remove any parts or panels that block access to the fuel tank and sender unit. In some vehicles, you may need to remove the back seat or the trunk panel to reach the fuel tank.
4.2 Disconnect the Battery
Before working on any electrical components, always disconnect the car battery to prevent any accidents or electrical shorts. This is an important safety step that I always take before working on any electrical system in my vehicle.
4.3 Inspect the Fuel Sender Unit and Wiring
Next, inspect the fuel sender unit and wiring. Use your multimeter to check for continuity and ensure the wiring is functioning properly. If you detect any issues with the wiring, such as broken or corroded connections, repair or replace the damaged sections. If the sender unit is faulty, it will need to be replaced. In my case, the sender unit was corroded and needed replacing.
4.4 Replace the Faulty Components
Once you’ve identified the faulty components, it’s time to replace them. Remove the old fuel sender unit carefully and install the new one in place. Make sure it’s securely fastened, and the connections are tight. I found that taking my time during this step helped avoid mistakes and ensured the new parts were properly installed.
4.5 Reassemble the System and Test the Fuel Gauge
After replacing the faulty components, reassemble any parts or panels that were removed to access the fuel system. Reconnect the battery, and test the fuel gauge to ensure it’s working correctly. You can do this by turning on the ignition and observing the fuel gauge’s movement as the fuel level changes. If everything looks good, lower the vehicle, and you’re done!
5. Tips for Maintaining Your Fuel Gauge and Preventing Future Issues
After fixing my faulty fuel gauge, I realized the importance of regular maintenance and inspections to keep the entire fuel system in good condition. Here are some tips I’ve learned to help maintain your fuel gauge and prevent future issues:
5.1 Regularly Inspect Fuel Lines and Wiring
Check the fuel lines and wiring periodically for signs of wear, corrosion, or damage. Regularly inspecting these components can help you catch problems early before they lead to more expensive repairs. I’ve made it a habit to check my car’s fuel system every six months to ensure everything is in working order.
5.2 Use High-Quality Replacement Parts
Whenever I replace parts in my car, I always opt for high-quality replacement parts to ensure durability and reliability. Using genuine OEM parts or high-quality aftermarket parts can extend the lifespan of your fuel gauge system and prevent future malfunctions.
5.3 Don’t Ignore Small Problems
If you notice your fuel gauge acting up or showing inaccurate readings, don’t ignore it. Addressing the issue early can save you from more costly repairs down the line. I’ve learned that it’s always better to fix small problems before they escalate.