Replacing a Damaged Headlight Assembly: A Step-by-Step Guide
As someone who has faced the frustration of dealing with a damaged headlight assembly, I can tell you that it’s one of those car repair tasks that seem complicated at first, but with the right tools and guidance, it can be done easily. I’ve had my fair share of experiences with broken headlights, and I’ve learned that replacing a headlight assembly is a manageable job that can be done in the comfort of your own driveway or garage. Whether it’s from an accident, wear and tear, or just a faulty bulb, this guide will help you get your car back to driving safely with fully functional headlights.

Sam's Club Tire & Battery
3600 O'Neill Dr, Jackson, MI 49202, USA
1. Why You Should Replace a Damaged Headlight Assembly
Before diving into the process of replacing your damaged headlight assembly, it's important to understand why it's essential. Over the years, I’ve realized that a working headlight is crucial for both safety and functionality. A damaged or broken headlight assembly not only impairs your visibility while driving at night, but it can also be a legal issue in many areas where vehicles are required to have functioning headlights at all times.
When I had my first experience with a broken headlight, I didn’t realize how much it affected my driving. The dimmer light output from a damaged headlight could make it harder to see the road, increasing the risk of an accident. In addition to the safety risks, driving with a broken headlight can result in fines if you’re pulled over by the police. For me, it was a no-brainer to fix the issue as soon as possible.

Firestone Complete Auto Care
200 S California St, Ventura, CA 93001, USA
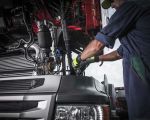
2. Tools You Will Need for the Job
Replacing the headlight assembly isn’t as intimidating as it may sound, but having the right tools is crucial for a smooth process. Over the years, I’ve gathered a toolkit for car repairs, and for this particular task, these are the basic tools I found essential:
- Screwdriver Set: A set of both flathead and Phillips screwdrivers will be necessary to remove screws from the headlight assembly.
- Socket Wrench Set: To remove bolts that hold the assembly in place, a socket wrench set will make it easier to get the right torque.
- New Headlight Assembly: Of course, you’ll need a new assembly to replace the damaged one. Make sure to purchase one that is compatible with your vehicle’s make and model.
- Rubber Gloves: Wearing gloves is essential to protect your hands from sharp edges and to keep the headlight components free of oil or dirt.
- Flashlight: If you're working in low light conditions, a good flashlight is essential for visibility when removing the assembly.
Once I had these tools on hand, I felt ready to tackle the job. I also recommend having a clean workspace and plenty of room to maneuver around the front of the vehicle.
3. Step-by-Step Guide to Replacing Your Headlight Assembly
Now that you have the right tools, it’s time to get started on the headlight replacement process. In my experience, the process can be broken down into simple steps that you can follow with ease. Below is the step-by-step guide I used to replace my damaged headlight assembly:
3.1 Step 1: Disconnect the Vehicle’s Battery
Before starting any repair work on your car, safety is the number one priority. I always begin by disconnecting the vehicle's battery to avoid any electrical mishaps. This is particularly important if you’re dealing with wiring near the headlights. Simply remove the negative terminal of the battery using a wrench. Once the battery is disconnected, you can safely proceed with the replacement process.
3.2 Step 2: Remove the Old Headlight Assembly
The next step is to remove the damaged headlight assembly. Typically, the headlight is secured by a few screws or bolts. I started by locating the screws that hold the headlight assembly in place, which are often on the top and sides of the assembly. Using a screwdriver or socket wrench, I carefully removed the screws and set them aside in a safe place.
Once the screws were removed, I gently pulled the headlight assembly forward. In some vehicles, the assembly may be connected to the electrical wiring, so be sure to disconnect the wiring harness before fully removing the old assembly. This can usually be done by pressing the tabs on the connector and pulling it free from the assembly.
3.3 Step 3: Install the New Headlight Assembly
With the old headlight assembly removed, it was time to install the new one. I began by connecting the wiring harness to the new headlight assembly, ensuring the connection was secure. It’s essential to check the electrical connection and make sure that the headlight bulbs are properly aligned within the new assembly.
Once the wiring was in place, I carefully slid the new headlight assembly into position, ensuring that the mounting points aligned correctly. After the assembly was in place, I reinstalled the screws or bolts to secure it. Tighten them firmly, but be careful not to overtighten and damage the assembly or the surrounding areas.
3.4 Step 4: Test the New Headlight
Before reattaching the battery, I recommend testing the new headlight to make sure everything is working properly. Once the assembly is in place, reconnect the vehicle’s battery and turn on the headlights. Check both the low beam and high beam settings to ensure they function properly. This is a critical step in verifying that your replacement was successful and that the new headlight assembly is aligned correctly.
3.5 Step 5: Reassemble the Area
Once I confirmed that the headlight was functioning properly, I reassembled the other parts of the vehicle, such as the grille or panels I may have had to remove to access the headlight assembly. Double-checking all the connections and ensuring everything is tightly secured is important for the stability and safety of the headlight.
4. Final Thoughts on Replacing a Headlight Assembly
Replacing a damaged headlight assembly was a rewarding experience for me, and with the right tools and guidance, it’s definitely a task that anyone can do. The process didn’t take long, and I felt confident in my ability to handle it. The key is being thorough and patient. If at any point you’re unsure about the process, don’t hesitate to consult your vehicle’s manual or reach out to a professional mechanic for advice.
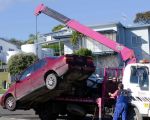
If you ever find yourself in a situation where you need roadside assistance or help with towing after a breakdown, I recommend checking out Rescue & Towing for the best services tailored to your needs. Whether you need help with a car repair or assistance during an emergency, their professional team can provide you with the support you need to get back on the road safely.