How to Replace a Flat Tire with a Spare: A Complete Step-by-Step Guide
There’s nothing more inconvenient than having a flat tire, especially when you’re in a rush or far from home. I remember the first time I had to replace a flat tire on my own; I was parked in the middle of nowhere on a rainy day, with no help in sight. After some initial panic, I remembered that I had a spare tire in the trunk and I had seen people do it a million times. The next few minutes turned into a learning experience for me. Now, I’m confident in my ability to replace a flat tire on my own, and I’d like to share the step-by-step process with you, so you’re prepared in case you ever find yourself in a similar situation.

MR. TIRE INC.
2078 New York Ave, Huntington Station, NY 11746, USA
1. Understanding Why You Need to Replace a Flat Tire
Before jumping into the process of replacing a flat tire, it’s important to understand why you need to do so quickly. A flat tire is not just an inconvenience, but a safety hazard as well. When you drive on a flat tire, you risk damaging the rim, potentially ruining your tire, and most importantly, losing control of your vehicle. When my tire went flat, I learned that a spare tire wasn’t just for convenience—it’s a safety tool. Replacing it quickly helps ensure you continue your journey without causing additional damage to your car and keeping you safe on the road.

Firestone Complete Auto Care
1933 N Placentia Ave, Fullerton, CA 92831, USA
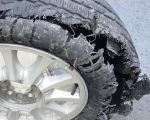
1.1 The Risks of Driving on a Flat Tire
In my case, I had been driving for a while when I noticed the car wasn’t handling properly. I thought it might have been just the road conditions, but then I noticed the tire pressure warning light flashing. I pulled over, only to find my tire completely flat. Driving on a flat tire can cause severe damage to the tire itself, the rim, and even the suspension components. It’s always best to replace it or get roadside assistance immediately. The risk of driving further outweighs the temporary inconvenience of stopping to change the tire.
2. Tools You’ll Need for Replacing a Flat Tire
Before you start, it’s important to gather all the necessary tools. The first time I tried to replace a flat tire, I realized I didn’t have everything I needed in the trunk. Luckily, I had some essential tools that allowed me to improvise. Here’s what you’ll need:
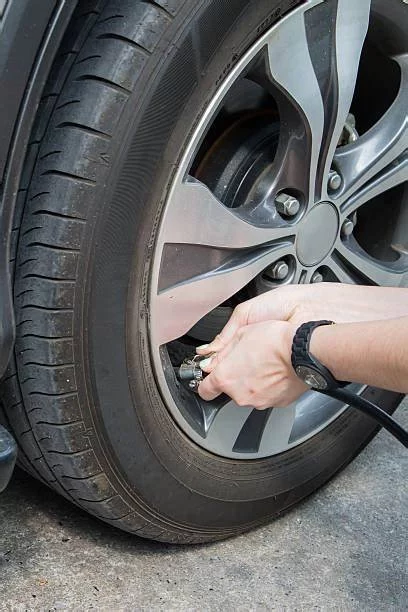
2.1 Spare Tire
The most obvious item you need is a spare tire. It’s important to make sure that your spare is in good condition and properly inflated. I made the mistake of not checking my spare once, and it was flat as well! Always make it a habit to check your spare tire’s condition, especially if you haven’t needed it for a while.
2.2 Jack and Jack Stands
You’ll need a jack to lift the car off the ground, so the flat tire can be replaced. Most vehicles come with a standard car jack, but if you plan on using it frequently, you might want to invest in a more stable, professional-grade jack. The jack stands are necessary to ensure the car remains secure while you work on it. It’s a good idea to never rely solely on the jack for stability.
2.3 Lug Wrench
A lug wrench is used to remove and tighten the bolts holding the tire in place. Most vehicles come with a basic lug wrench, but for ease and speed, you might consider investing in a cross wrench, which offers more leverage and makes loosening the bolts much easier.
2.4 Wheel Chocks
While it’s not always included in the kit, I recommend using wheel chocks to prevent the vehicle from rolling while you’re working on it. Simply place the chocks behind the wheels on the opposite side of the car to secure it in place. I found that this added an extra layer of safety during the replacement process.
3. Step-by-Step Guide: How to Replace a Flat Tire
Once you have all the tools and your vehicle is in a safe location, you can start the process of replacing your flat tire. Here’s a step-by-step guide that helped me when I was stuck:
3.1 Step 1: Ensure Safety First
The first thing you need to do is ensure your safety. I remember pulling over and making sure I was as far from traffic as possible. Turn on your hazard lights to alert other drivers, and if you’re on the side of the highway, try to pull over to a flat, stable surface. Put the car in park and apply the parking brake. Once these steps are done, you’re ready to begin.
3.2 Step 2: Loosen the Lug Nuts
Before lifting the car, you need to loosen the lug nuts on the flat tire. Use your lug wrench to turn the nuts counterclockwise, but don’t remove them entirely yet. I learned that it’s easier to loosen them while the tire is still on the ground because it provides extra stability. If they’re tight, applying force with your full body weight might be necessary, so be prepared to put in a little effort.
3.3 Step 3: Lift the Car with the Jack
Once the lug nuts are loose, it’s time to lift the car. Position your jack under the car’s jacking point (usually located near the wheel well) and begin lifting the car slowly. Be careful not to lift the car too high—just enough to raise the flat tire off the ground. At this point, I always double-check that the car is steady and secure on the jack before proceeding further.
3.4 Step 4: Remove the Flat Tire
Once the car is elevated, finish removing the lug nuts. I always make sure to keep them in a safe spot so they don’t get lost. Then, carefully remove the flat tire from the hub. It may take a little wiggling to get it off, but with some effort, the tire should come free.
3.5 Step 5: Mount the Spare Tire
Take your spare tire and align it with the wheel hub. Slide it onto the hub and make sure it’s snug. At this point, I place the lug nuts onto the bolts and tighten them by hand as much as possible. It’s essential not to skip this step because it’ll prevent the tire from moving when you’re tightening it further.
3.6 Step 6: Tighten the Lug Nuts
Now, using your lug wrench, tighten the lug nuts in a crisscross pattern. This ensures that the tire is evenly secured. Tightening the nuts too much can damage the wheel, so apply pressure slowly and evenly. I’ve found that it’s important not to rush this step to ensure everything is properly aligned.
3.7 Step 7: Lower the Car
Once the lug nuts are secure, slowly lower the car using the jack. Lower the car completely until it’s resting on the ground. Once it’s down, do a final tightening of the lug nuts to make sure they’re as secure as possible.
3.8 Step 8: Check Everything
Finally, give the spare tire a quick inspection. Ensure that everything is tightened properly, the tire is aligned, and you’ve got everything in place. When I was done, I made sure to put the flat tire, tools, and jack back in the trunk so that I could properly dispose of the damaged tire later.
4. Tips for Preventing Future Flat Tires
Having a flat tire is a frustrating experience, but it’s even more frustrating if it happens frequently. Here are a few tips that I’ve learned to help prevent future flat tires:
4.1 Regular Tire Inspections
I now make it a habit to regularly inspect my tires for any signs of wear or damage. I check the tread, look for any punctures, and ensure that the tire pressure is within the recommended range. I’ve also started rotating my tires regularly to ensure even wear, which helps prevent flats.
4.2 Avoiding Potholes and Debris
New York City streets are notorious for potholes and debris. Over time, these can cause tire damage, so I’ve started driving more carefully around them. By avoiding obstacles like large potholes, curbs, and sharp objects, I’ve reduced the chances of puncturing a tire.
4.3 Keeping a Spare Tire in Good Condition
Make sure your spare tire is in good shape and properly inflated. I always check my spare before long trips, as a flat spare is just as bad as no spare at all. I also make sure to have all the necessary tools in my car in case of emergencies.
5. Conclusion: Be Prepared and Stay Safe
Replacing a flat tire with a spare is an essential skill every driver should have. While it can seem daunting at first, the process is simple and, with the right tools and preparation, you can easily handle it on your own. Remember, the key is to stay calm, be organized, and follow the steps carefully. If you find yourself in a situation where you’re unable to replace the tire on your own, it’s always a good idea to have a trusted towing service available to help. After all, safety is the most important thing on the road, and a flat tire doesn’t have to stop you from getting where you need to go.
If you’re ever in need of roadside assistance, don’t hesitate to reach out to a reliable towing service that can help you with tire changes, repairs, and other emergencies.