Why Replacing Your Car's Differential Fluid Is Important
If you're like me, you probably don’t think about your car's differential until something goes wrong. I used to ignore the importance of the differential fluid, but after a few mechanical mishaps, I quickly learned just how critical it is. The differential is the component that allows your car's wheels to rotate at different speeds, especially when turning corners. This process creates friction, which generates heat. To keep everything running smoothly, the differential fluid serves as both a lubricant and a coolant. If left unchecked, dirty or low differential fluid can cause damage, leading to costly repairs.
Sam's Club Tire & Battery
3600 O'Neill Dr, Jackson, MI 49202, USA
When Should You Replace Differential Fluid?
Knowing when to replace the differential fluid can be tricky, especially since it doesn't need to be done as frequently as an oil change. Generally, the recommendation is every 30,000 to 60,000 miles, but this can vary depending on your vehicle type and driving habits. If you frequently drive in harsh conditions, such as towing heavy loads or off-roading, you might need to replace the fluid more often.
Signs that it's time to replace your differential fluid include:
- A whining or howling noise from the rear of the vehicle
- Difficulty turning or a noticeable resistance while turning
- Vibration or rough handling while driving
- Burnt smell or dark, gritty fluid when you check it
Tools You'll Need to Replace Differential Fluid
Before you start, make sure you have the right tools. Replacing the differential fluid is something most people can do themselves with a little patience and the proper equipment. Here's what you'll need:
- A car jack and jack stands
- Drain pan
- Socket wrench with extension
- Large funnel
- New differential fluid (check your owner’s manual for the correct type)
- Gloves and safety glasses
Step-by-Step Guide: How to Replace Differential Fluid
Step 1: Lift the Vehicle
The first thing you need to do is safely lift the car. Use a car jack to elevate the vehicle and then secure it with jack stands. This step is crucial for your safety, as you’ll be working underneath the car. Be sure the car is stable before proceeding.

Firestone Complete Auto Care
200 S California St, Ventura, CA 93001, USA
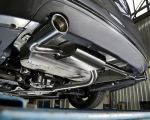
Step 2: Locate the Differential Plug
Now, slide under the vehicle to locate the differential. You’ll find two plugs—one on the top and one on the bottom. The top plug is for filling the differential, while the bottom plug is for draining the fluid. Make sure you know which is which.
Step 3: Drain the Old Fluid
Place your drain pan beneath the differential plug. Using your socket wrench, remove the bottom plug to allow the fluid to drain out. Be patient—it may take a few minutes for all the fluid to completely drain. This is the best time to check the condition of the fluid. If it looks dirty or has a burnt smell, it’s definitely time for a replacement.
Step 4: Inspect the Drain Plug
Once the fluid is drained, take a moment to inspect the drain plug. Some vehicles have a magnetic drain plug that collects metal shavings. If you notice an unusual amount of metal debris, it could indicate a problem with the gears inside the differential. If everything looks good, clean the plug and set it aside.
Step 5: Fill with New Differential Fluid
Next, use a large funnel to fill the differential with the new fluid. Refer to your owner's manual to determine the exact amount needed for your vehicle. It's important not to overfill, as this can cause excessive pressure inside the differential, leading to leaks or other problems.
Step 6: Replace the Fill Plug
Once the differential is filled with fresh fluid, replace the top (fill) plug. Make sure it’s tightly secured to prevent any leaks.
Step 7: Lower the Vehicle
Carefully lower the car back to the ground using the jack. Make sure everything is tight and secure before taking the car for a test drive.
Step 8: Test Drive
Take your car for a short test drive to ensure everything feels smooth. Listen for any unusual noises, and check for leaks around the differential. If everything feels normal, you’re done!
My Experience with Replacing Differential Fluid
When I first decided to tackle this job myself, I was a bit nervous. I had heard horror stories about people messing up their differential fluid change, but I was determined to save some money and learn how to maintain my car. The first time I did it, I was amazed at how simple the process was once I had the right tools and instructions. The hardest part was getting the car elevated safely. After that, it was just a matter of draining the old fluid and refilling with the new one.
Since then, I’ve been replacing the differential fluid every 40,000 miles. It’s a great way to keep my car running smoothly, and I’ve never had any problems with the differential. I even saved a significant amount of money by doing it myself rather than taking it to a mechanic.
Conclusion
Replacing your car’s differential fluid doesn’t have to be a daunting task. With the right tools, a little time, and some patience, you can do it yourself and enjoy the peace of mind that comes with knowing your car is well-maintained. By following these simple steps, you’ll ensure your differential operates efficiently, saving you from expensive repairs down the road. Plus, it's a great DIY car repair skill to add to your repertoire!