
How to Replace the Brake Pads on Your Car: A Complete DIY Guide
Published on Apr 21, 2025
Auto Repair Shops Near Me


Recommended

How to Find the Best Car Repair Specialists Near Me: A Complete Guide
Discover how to find the best car repair specialists near you with this step-by-step guide. Learn the key factors to consider, and get practical tips for choosing reliable and trustworthy auto repair services.
Apr 24, 2025
Reliable 24/7 Towing Service: Always Ready to Help in an Emergency
Stranded on the road? Our 24/7 towing service is always ready to assist you with quick, reliable, and safe towing. Get back on the road in no time with our professional roadside assistance services in the USA.
Apr 24, 2025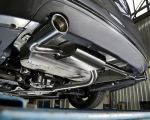
How to Fix a Leaking Car Exhaust System: A Comprehensive Guide
Learn how to fix a leaking car exhaust system with this step-by-step guide. Discover easy DIY solutions for exhaust leaks, common symptoms, and essential repair tips to keep your vehicle running smoothly.
Apr 24, 2025
How to Handle a Car with Fuel System Issues: Troubleshooting and Repair Tips
Dealing with car fuel system issues? Learn how to handle fuel system problems with this detailed guide. Step-by-step troubleshooting tips and maintenance advice.
Apr 24, 2025
How to Fix Car Power Steering Problems: A Step-by-Step Guide
Struggling with power steering problems in your car? Learn how to diagnose and fix common issues with your car’s power steering system. From fluid leaks to worn-out pumps, this guide covers it all.
Apr 24, 2025
How to Repair a Cracked Windshield: A Step-by-Step Guide for DIY Fixes
Learn how to repair a cracked windshield with this step-by-step guide. Get tips and techniques for fixing small chips and cracks to restore your car's windshield to its original condition.
Apr 24, 2025Related Categories
Popular

How Towing Services Can Help with Engine Overheating: Immediate Assistance When Your Engine Runs Hot
Jan 24, 2025
Emergency Vehicle Towing Guide for Miami: What You Need to Know
Jan 24, 2025
The Best All-Season Tires for Your Car in 2025: Top Picks for Every Driver
Mar 07, 2025
How to Safely Use Towing Services for Vehicles with Dead Batteries
Jan 24, 2025
Why You Should Always Carry Roadside Assistance Coverage: The Key Benefits and Importance
Jan 24, 2025
Reliable Towing for Electric Vehicles in Madison: Your Trusted Roadside Assistance
Jan 24, 2025
Flatbed Towing vs. Traditional Towing in Chicago: Which is Right for Your Vehicle?
Jan 22, 2025
Comprehensive Guide to Roadside Emergency Services: Towing, Car Rescue, and More
Feb 24, 2025
What to Do After an Accident in San Francisco: A Step-by-Step Guide
Jan 22, 2025