How to Replace Your Car’s Power Brake Booster
If you’re like me, you take the performance and safety of your vehicle seriously. One of the most crucial components of your car's braking system is the power brake booster, which helps amplify the force you apply to the brake pedal. Over time, this part can wear out or fail, causing your braking performance to deteriorate. Replacing your car’s power brake booster may sound like a daunting task, but with the right tools and a bit of patience, it’s a job you can tackle yourself. Let me walk you through the process of replacing your car's power brake booster, step by step.

Pick Your Part - Help Yourself
1232 Blinn Ave, Wilmington, CA 90744, USA
1. Understanding the Power Brake Booster
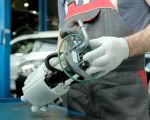
Before you dive into replacing the brake booster, it’s important to understand its function. The power brake booster is a vacuum-assisted device that helps reduce the amount of force needed to apply the brakes. Essentially, it multiplies the force from your foot on the brake pedal, making it easier to stop your car. When it malfunctions, you may experience hard braking or increased effort needed to stop your car, which can be both frustrating and dangerous.

IMC powered by Parts Authority
139 Lafayette Dr, Syosset, NY 11791, USA
2. Symptoms of a Failing Brake Booster
So, how do you know if your brake booster is on its way out? From personal experience, here are some telltale signs that your brake booster may be failing:
- Hard brake pedal: If you notice that the brake pedal feels unusually stiff or requires more pressure to stop the vehicle, it could be a sign of a faulty brake booster.
- Increased stopping distance: A damaged brake booster can lead to longer stopping distances, which is particularly concerning during emergency braking situations.
- Hissing noise: A vacuum leak in the brake booster can produce a hissing sound when you press the brake pedal, indicating an issue with the booster’s internal seals.
If you’re experiencing any of these symptoms, it's time to consider replacing the power brake booster.
3. Tools You’ll Need for the Job
Replacing the power brake booster requires a few basic tools. Here’s a list of what you’ll need:
- Socket wrench set
- Ratchet and extensions
- Torque wrench
- Flathead screwdriver
- Brake fluid
- Replacement power brake booster
It’s always a good idea to have a repair manual for your specific vehicle model, as some cars may have unique steps or bolts that require specialized tools.
4. Disconnecting the Battery
Before you begin working on your car’s brake system, it’s important to disconnect the battery. This will prevent any electrical shorts or mishaps while working under the hood. Simply remove the negative terminal from the battery using a wrench, and set it aside to ensure it doesn’t come into contact with anything metal.
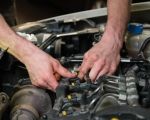
5. Removing the Old Power Brake Booster
Now that you’re ready to begin, let’s walk through the steps of removing the old brake booster. The process may vary slightly depending on your vehicle, but in general, you’ll follow these steps:
- Remove the brake master cylinder: The brake master cylinder is usually attached to the brake booster, so you’ll need to remove it first. Use your socket wrench to detach the bolts holding the master cylinder in place. Be careful with the brake lines, as you don’t want to damage them.
- Disconnect the vacuum hose: The brake booster operates on vacuum pressure, so disconnect the vacuum hose from the booster. Use a flathead screwdriver if necessary to loosen any clamps.
- Unbolt the brake booster: Once the master cylinder and vacuum hose are removed, you can unbolt the brake booster from its mounting. Use a ratchet wrench to remove the bolts, and carefully take the brake booster out of its mounting position.
6. Installing the New Power Brake Booster
With the old brake booster removed, it’s time to install the new one. Follow these steps to ensure proper installation:
- Position the new brake booster: Carefully place the new power brake booster into the mounting bracket. Make sure it aligns correctly with the master cylinder and vacuum hose.
- Reattach the brake master cylinder: Once the new booster is in place, reconnect the brake master cylinder to the booster. Tighten the bolts securely using your socket wrench.
- Reconnect the vacuum hose: Attach the vacuum hose to the brake booster, ensuring it’s firmly secured with a clamp.
- Tighten the mounting bolts: Use your ratchet wrench to tighten all the mounting bolts that hold the brake booster in place. Be sure to torque the bolts to the manufacturer’s specifications to avoid over-tightening.
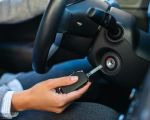
7. Reconnecting the Battery and Testing the Brakes
With everything reassembled, it’s time to reconnect the battery. Once the battery is reconnected, start the engine and test the brakes by gently pressing the brake pedal. You should feel a noticeable difference in the brake pedal’s responsiveness. If everything feels right, you’ve successfully replaced your brake booster!
However, it’s always a good idea to take your car for a short test drive to ensure that the brakes are functioning properly. During the test drive, pay attention to the brake pedal feel and listen for any unusual noises. If you encounter any issues, don’t hesitate to consult a professional mechanic.
Replacing the power brake booster on your car might seem intimidating, but with the right tools and guidance, it’s an achievable DIY task. By following the steps I’ve outlined here, you can restore your vehicle’s braking performance and drive with confidence. If you ever feel unsure about any part of the process, it’s always best to seek help from a qualified mechanic.