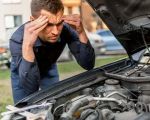
Step-by-Step Guide for Jumpstarting a Car: What You Need to Know
There’s nothing more frustrating than turning the key and realizing that your car won’t start. Whether it’s a dead battery, cold weather, or some other issue, a car that won’t start can derail your plans in an instant. I’ve been in this situation before, and one of the most useful skills I’ve learned over the years is how to jumpstart a car. The first time I had to do it, I was unsure of what to do, but after a few tries and some guidance, I managed to get my car back on the road. If you’ve ever found yourself stranded with a dead battery, this step-by-step guide will show you how to jumpstart your car safely and confidently.
1. Gather the Right Tools
Before you even think about jumpstarting your car, you need to make sure you have the proper tools. The first time I had to jumpstart my car, I made the mistake of rushing into the situation without making sure I had everything I needed. Not only did I waste time looking for cables, but I also realized I didn’t have the right equipment to do the job safely. Let me tell you, having the right tools makes the whole process go much smoother.
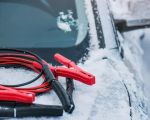
1.1 Jumper Cables
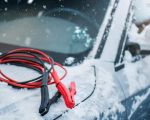
Obviously, the most important tool is a good set of jumper cables. I’ve used a few different sets over the years, and I recommend getting a heavy-duty pair that has thick, durable wires. Cheap cables might not carry enough current to jumpstart your car efficiently. The longer the cables, the easier it is to reach between cars if they’re parked at a distance. Keep in mind that you should always check for any frays or damage to the cables before using them.
1.2 A Working Car
You can’t jumpstart a car without a second vehicle with a working battery. This is something I learned the hard way. Make sure the car you’re using to jumpstart your vehicle is turned off and in good condition. It should be parked close enough to your vehicle so that the jumper cables can easily reach both batteries. Ideally, the car that is jumpstarting yours should have a battery that’s at least as strong as yours—better yet, a little stronger.
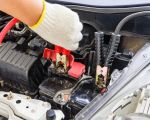
1.3 Safety Gear
While not always necessary, wearing gloves and safety glasses can protect you in case something goes wrong. I’ve never had an issue with sparks or a battery explosion, but it’s better to be safe than sorry. It’s also a good idea to keep a flashlight in your car, especially if you find yourself in the dark. I had one instance where I had to jumpstart my car at night, and the flashlight saved me from fumbling around.
2. Safety First: Precautions to Take
Jumpstarting a car may seem like a simple task, but there are several precautions you should take to avoid damaging your car’s electrical system or even causing an accident. I learned these the hard way after a few close calls with sparks and incorrect connections.
2.1 Avoid Sparks and Short Circuits
When jumpstarting a car, the first rule is to avoid creating sparks or short circuits. In my early days, I was overly eager and didn’t realize that connecting the cables in the wrong order could cause sparks or even damage the car’s electrical system. Always ensure you’re following the correct order of connections to avoid any issues.
2.2 Turn Off Both Cars
Before connecting the jumper cables, make sure both cars are off. I remember my first time trying to jumpstart a car, and I mistakenly left one car running while I connected the cables. The result was a bit of electrical confusion. It’s essential to have both vehicles off before attaching the jumper cables to avoid any electrical surges.
2.3 Keep the Cars in Park or Neutral
Ensure both cars are in park (or neutral for manual transmissions) with the parking brake engaged. I once forgot to do this, and as I connected the cables, one of the cars began to roll slightly, making the whole process a bit more complicated. So, to make it as smooth as possible, always secure the cars in place first.
3. Step-by-Step Guide to Jumpstarting Your Car
Now that you have your tools and precautions in place, here’s a detailed step-by-step guide on how to jumpstart your car. Following these steps will ensure that you do it safely and effectively.
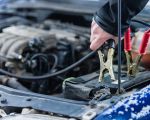
3.1 Position the Cars
Start by positioning the two cars close enough that the jumper cables can reach both batteries. I usually park them with the front ends facing each other, but make sure there’s enough room for you to comfortably work. Once the cars are positioned, turn both vehicles off and remove the keys from the ignition.
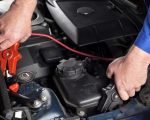
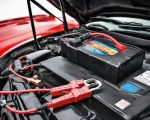
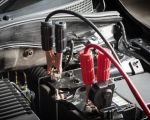
3.2 Attach the Jumper Cables to the Batteries
Now, let’s get the cables attached in the correct order. I remember being so nervous the first time I did this, but once I understood the order, it was simple. Here’s the correct order:
- Red cable (positive) to the dead battery: Attach one end of the red (positive) cable to the positive terminal of the dead battery. It’s usually marked with a plus sign (+).
- Red cable (positive) to the working battery: Attach the other end of the red cable to the positive terminal of the working battery.
- Black cable (negative) to the working battery: Now, take the black (negative) cable and attach one end to the negative terminal of the working battery. It’s typically marked with a minus sign (-).
- Black cable (negative) to an unpainted metal surface: The last step is where I made my mistake early on. Don’t attach the black cable directly to the negative terminal of the dead battery. Instead, attach the other end of the black cable to a clean, unpainted metal surface on the engine block or the car’s frame. This helps avoid sparks near the battery.
3.3 Start the Working Car
Once the cables are securely attached, start the car with the working battery. I usually let it run for a minute or two to get the battery charging before trying to start the dead car. It’s important to give it some time, as jumping a dead battery can be demanding on both cars’ electrical systems.
3.4 Start the Dead Car
After the working car has been running for a minute, try starting the dead car. If it starts, great! But if it doesn’t, give it another minute or so before trying again. In my experience, sometimes it takes a couple of attempts to get the battery to charge enough to start the engine. If it still doesn’t start after a few attempts, there may be an underlying issue with the battery or the electrical system, and you might need professional help.
3.5 Disconnect the Cables
Once the car with the dead battery starts, carefully disconnect the jumper cables in the reverse order:
- Remove the black (negative) cable from the metal surface.
- Remove the black (negative) cable from the working car’s battery.
- Remove the red (positive) cable from the working car’s battery.
- Finally, remove the red (positive) cable from the revived car’s battery.
3.6 Let the Car Run
After the car starts, let it run for at least 20-30 minutes to allow the alternator to fully recharge the battery. I usually drive around or let the car idle to ensure the battery gets a good charge.
4. Troubleshooting Tips
Sometimes, even after following all the steps, the car may not start. Here are a few troubleshooting tips from my own experience:
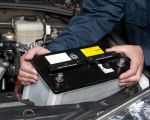
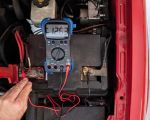
4.1 Check for a Faulty Battery
If the car still doesn’t start after several attempts, the battery may be too far gone to jumpstart. In this case, it’s time to replace the battery. I’ve had a battery that wouldn’t hold a charge despite multiple attempts, and it was ultimately a sign that it was time for a new one.
4.2 Check the Alternator
If the car starts but then dies shortly after, it could be an issue with the alternator. The alternator charges the battery when the car is running, so if it’s not working properly, your battery might not be getting charged. I had a situation where my car would run only for a few minutes before dying, and after a trip to the mechanic, I learned that the alternator needed replacing.
5. Conclusion
Jumpstarting a car is an essential skill that can save you in an emergency. It’s always helpful to have jumper cables in your car, and knowing how to use them properly can prevent a lot of frustration and stress. After a few tries, you’ll feel confident handling it on your own, and it’s a skill that can come in handy more often than you think. Stay safe, and always make sure you’re prepared with the right tools and knowledge!