Practical Tips for Fixing Car Oil Leaks
Oil leaks in your car can be a frustrating problem. A few months ago, I found myself dealing with an annoying oil leak in my car. At first, I wasn’t sure where the oil was coming from, and I was worried about the cost of repairs. After some research, trial and error, and a little bit of elbow grease, I figured out how to fix it. If you’re in the same situation, don’t worry. Fixing an oil leak is not as difficult as it seems, and with the right approach, you can solve it without draining your wallet. Here’s what I’ve learned about fixing car oil leaks, step-by-step.

Junior Auto Body Solutions LLC
10409c Merrick Blvd, Jamaica, NY 11433, USA
1. Identifying the Source of the Leak
The first thing I had to do was figure out exactly where the oil was leaking from. Oil leaks can be tricky because they don’t always drip from the same spot where the problem originates. To begin with, make sure you clean the area around your engine. You can use a degreaser or a rag to wipe down the oil spots around the engine block, valve covers, and oil pan. Once you’ve cleaned it, run the engine for a while and then check for fresh oil spots. This step will help you pinpoint the location of the leak.
From my experience, oil leaks usually occur from one of the following common areas:
- Oil Pan: The oil pan can develop cracks or lose its seal over time. This is one of the most common places for leaks.
- Valve Cover Gaskets: The gaskets between the valve covers and engine can wear out, causing oil to seep out.
- Oil Filter or Drain Plug: If the oil filter or drain plug isn’t properly tightened, oil can leak from these points.
- Oil Pressure Switch: The oil pressure switch can also leak oil, especially if the seals are worn.
It’s important to check all these areas to determine where the leak is coming from. When I found the source of my leak, it turned out to be a worn-out gasket near the valve cover. I’m glad I didn’t ignore the problem—it could’ve caused bigger issues down the road!

Premier auto solutions ny
532 Ray St, Freeport, NY 11520, USA
2. Fixing Small Leaks with a Stop Leak Additive
If you’ve identified a small leak or just want a temporary solution, using a stop leak additive can be a quick fix. I used this method before tackling a bigger repair. There are many stop-leak products available on the market, and they work by temporarily sealing small leaks in the engine. It’s a simple process: just add the product to your engine oil, and it will help seal minor leaks.
However, be cautious when using stop-leak products. They are not a permanent solution, and if your leak is large or comes from a major part like the oil pan or gasket, you’ll need to do a more thorough repair. In my case, the stop-leak product worked for a few weeks, but I eventually had to replace the valve cover gasket.
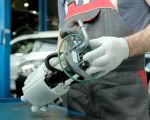
3. Replacing the Valve Cover Gasket
After trying the stop-leak solution, I realized that my leak wasn’t going away, so I decided to replace the valve cover gasket myself. It’s a relatively simple repair that anyone can do with the right tools. Here’s how I did it:
- Step 1: Gather the Necessary Tools: You’ll need a socket set, screwdrivers, a new gasket, and a gasket scraper.
- Step 2: Remove the Old Valve Cover: Start by loosening the bolts that hold the valve cover in place. Be sure to keep track of the bolts and remember the order in which they come off.
- Step 3: Clean the Surface: Once the valve cover is removed, clean the surface where the gasket sits. This step is crucial because any leftover oil or debris can prevent the new gasket from sealing properly.
- Step 4: Install the New Gasket: Place the new gasket into the valve cover and carefully reinstall it on the engine. Tighten the bolts evenly in a crisscross pattern to ensure the gasket is seated properly.
- Step 5: Test the Repair: After you’ve reassembled everything, start the engine and check for leaks. If the oil leak is gone, you’ve successfully replaced the valve cover gasket!
It wasn’t as difficult as I thought it would be, and I was proud of myself for handling the repair. Not only did it save me money, but I also gained a lot of confidence in doing my own car repairs. However, if you’re not comfortable with the idea of replacing the gasket yourself, it’s always a good idea to seek professional help.
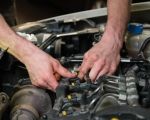
4. Tightening the Oil Filter and Drain Plug
Sometimes, oil leaks can occur because the oil filter or drain plug is loose. This was actually the case during one of my early car repairs. It’s an easy fix that doesn’t require a lot of time or effort. Here’s how I tackled it:
- Step 1: Check the Oil Filter: Make sure the oil filter is properly tightened. If you recently changed the oil, the filter might not have been tightened enough. Use an oil filter wrench to ensure it’s snug.
- Step 2: Check the Drain Plug: Similarly, check the oil drain plug. If it’s loose, oil can leak out. Tighten it with a socket wrench, but be careful not to overtighten, as this could strip the threads.
If you’ve changed your own oil before, you’ll know that the drain plug and oil filter are common culprits for leaks. Tightening these components properly should help prevent leaks from these areas.
5. When to Seek Professional Help
While fixing small leaks is a task that can be handled with some DIY skills, there are times when it’s best to leave it to the professionals. If your oil leak is coming from a more complex part, like the oil pan, or if you’re unsure about the source, it might be time to call a mechanic.
During one of my earlier oil leak repairs, I thought I could fix a leak that was coming from the oil pan myself. However, after examining it further, I realized that I didn’t have the equipment or knowledge to handle the job properly. I ended up taking the car to a mechanic, who was able to replace the pan and seal it correctly.
Don’t hesitate to reach out to a professional if you’re unsure about tackling the repair yourself. An experienced mechanic can save you time and prevent further damage to your car.